In my last post, I finished making the anti-vibration pads. Today, I’m finally getting started on assembling my new racing wheel stand. Sim racing gear isn’t cheap, and there are so many options out there, so it took me a long time to finally pull the trigger and place my order. After an exciting wait, the first piece of equipment to arrive was the racing wheel stand: the Thermaltake GR500.

Thermaltake is a Taiwanese brand specializing in PC peripherals. For years, they’ve been known for their unique designs in computer hardware like cases, coolers, and power supplies. Leveraging their accumulated expertise in custom builds and structural engineering, they’ve recently expanded their lineup into gaming and sim racing gear. The GR300 and GR500 series are their flagship products in this new venture.
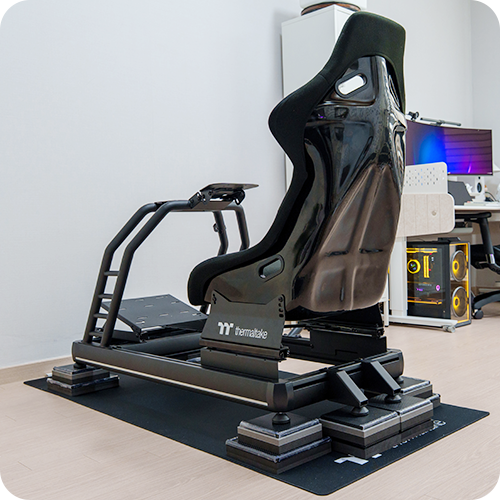
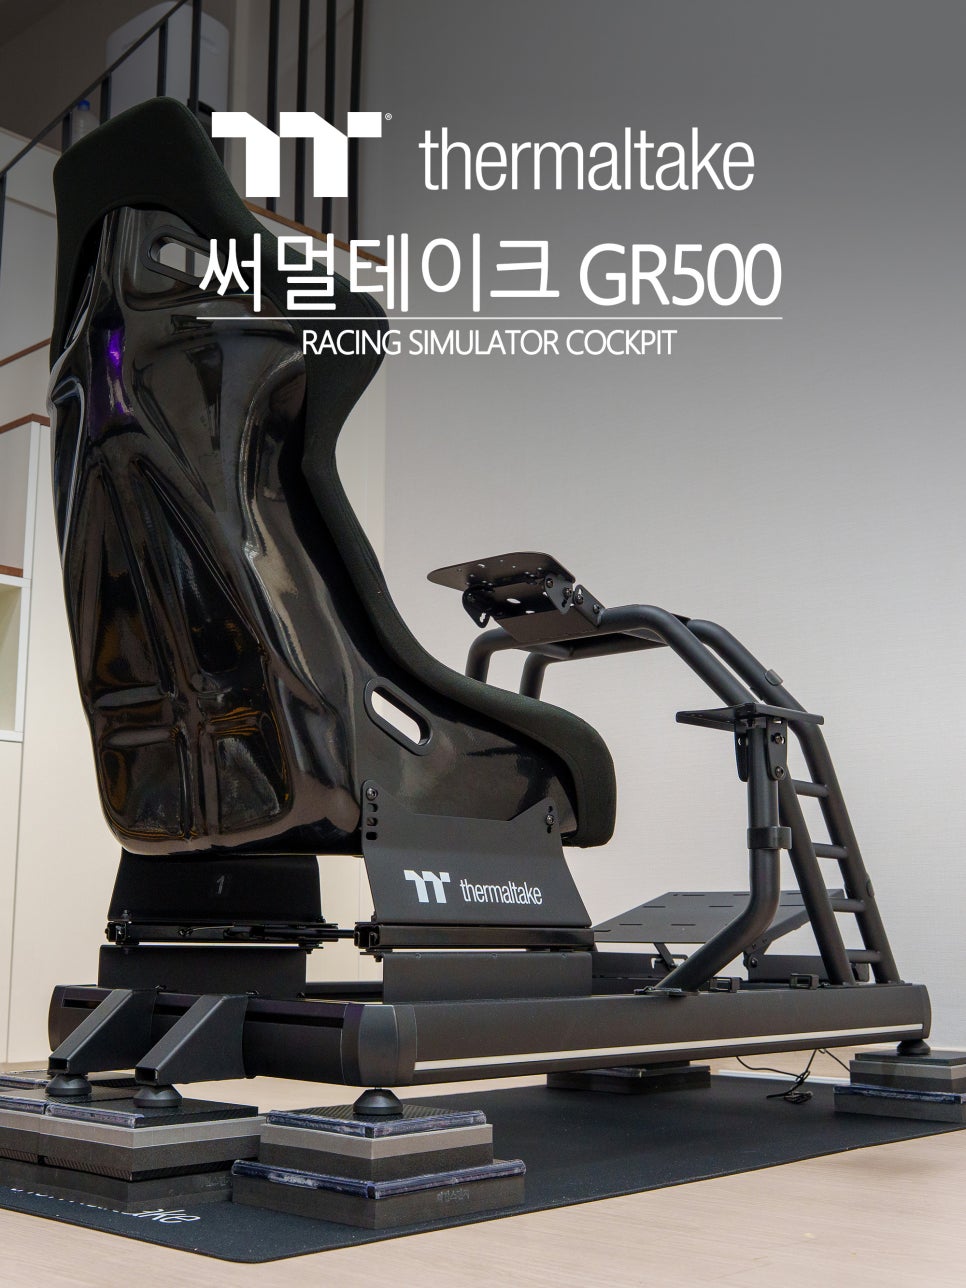
The GR500 is a racing simulator cockpit designed to cater to everyone from sim racing beginners to pro-level users. It comes complete with a bucket-style racing seat that creates an immersive experience, much like being in a real race car. In today’s post, I’ll walk you through the assembly of the Thermaltake GR500, taking a closer look at its structure and features step by step.
Components and Specs
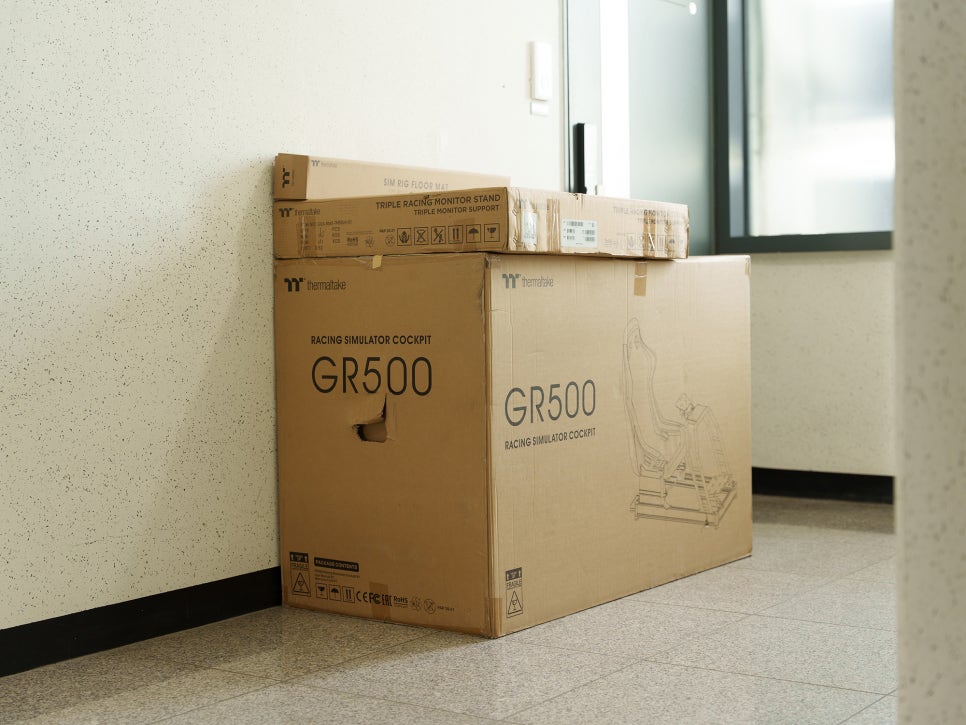
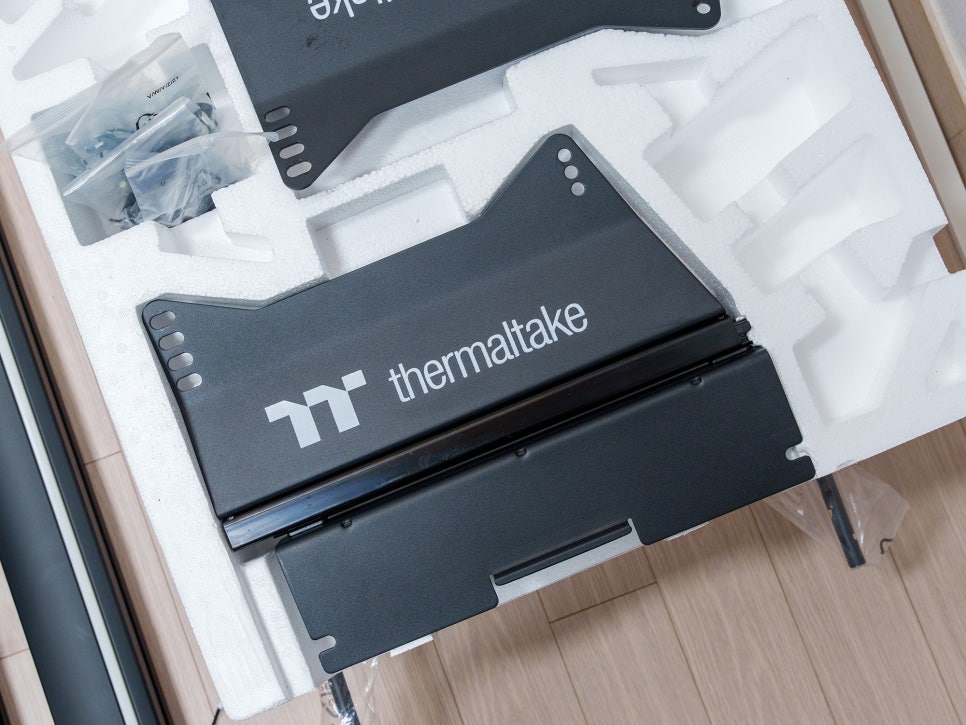
The moment I saw the box delivered, my first thought was, “Wow, this is way bigger than I expected.” It was large enough to fit two adults and was incredibly heavy. I couldn’t move the box inside on my own, so I had to open it in the hallway and carry the parts into my room one by one.
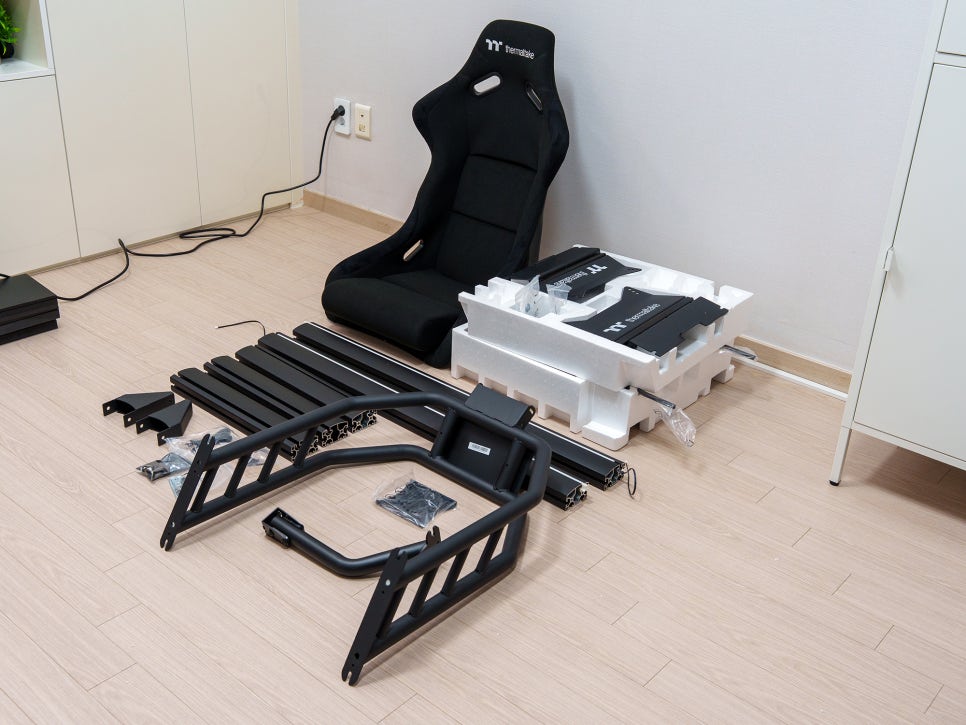
The GR500 is a full cockpit setup that includes the racing seat. Unlike the GR300, it’s a hybrid cockpit that combines an aluminum profile with a steel frame.
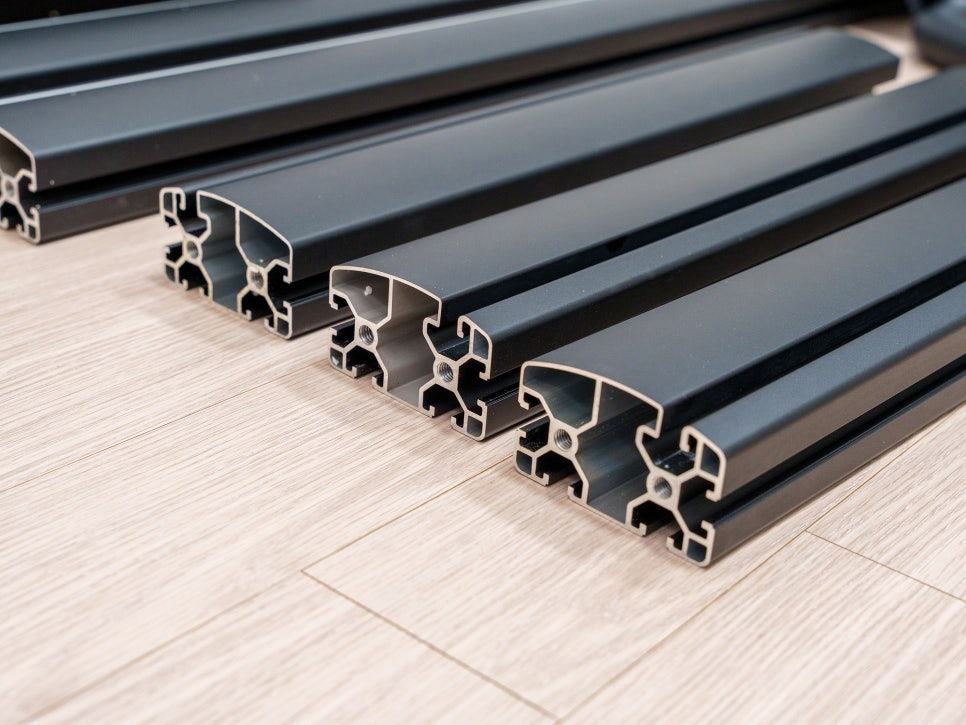
The base frame is designed with aluminum profiles, but unlike typical profile rigs, the outer surfaces are smoothly finished, giving it a very clean look. Most of the other components are made of steel, which makes them feel heavy and contributes to the overall sturdy impression.

I originally chose the GR500 because I wanted the white version, but I ended up getting it in black. Right before ordering, I asked a friend for one last piece of advice, and he mentioned that white can be prone to discoloration over time and is harder to maintain. So, I switched the color to black just before finalizing my order.
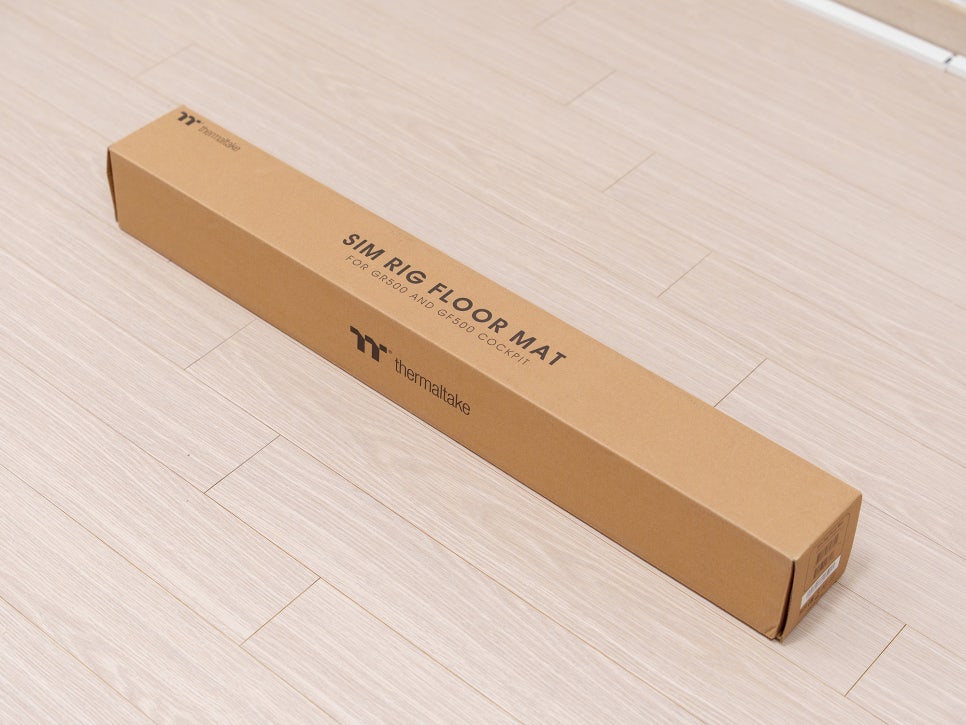
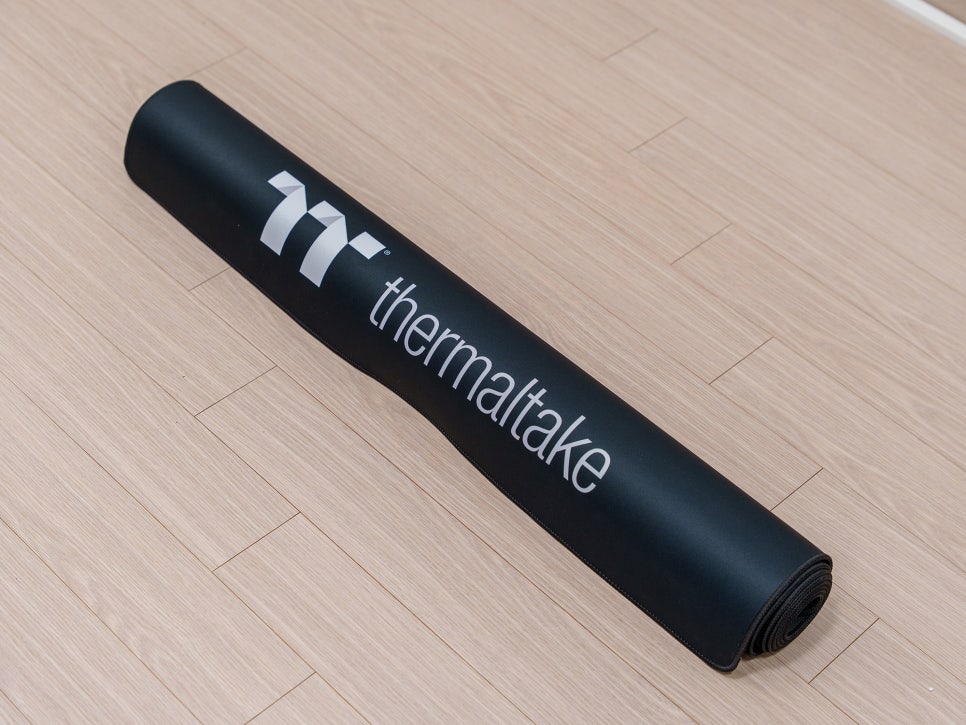
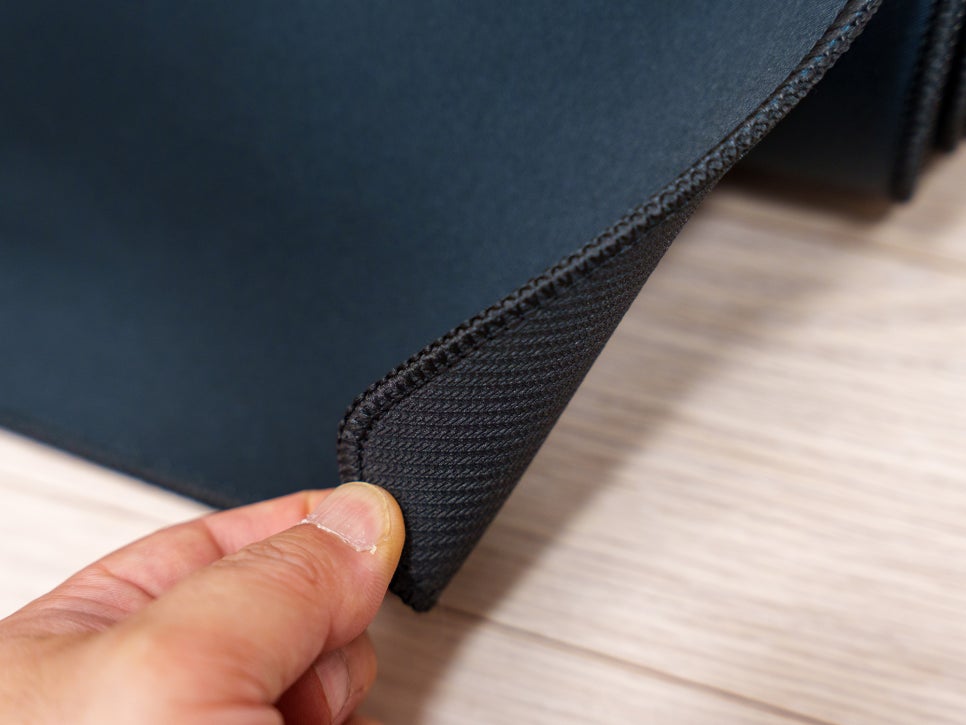
As a purchase bonus, the GR500 comes with a free seamless floor mat, which normally retails for around 70,000 won. The mat is much thicker than a mousepad but not quite as thick as an exercise mat—it’s somewhere right in the middle.
Assembly Process
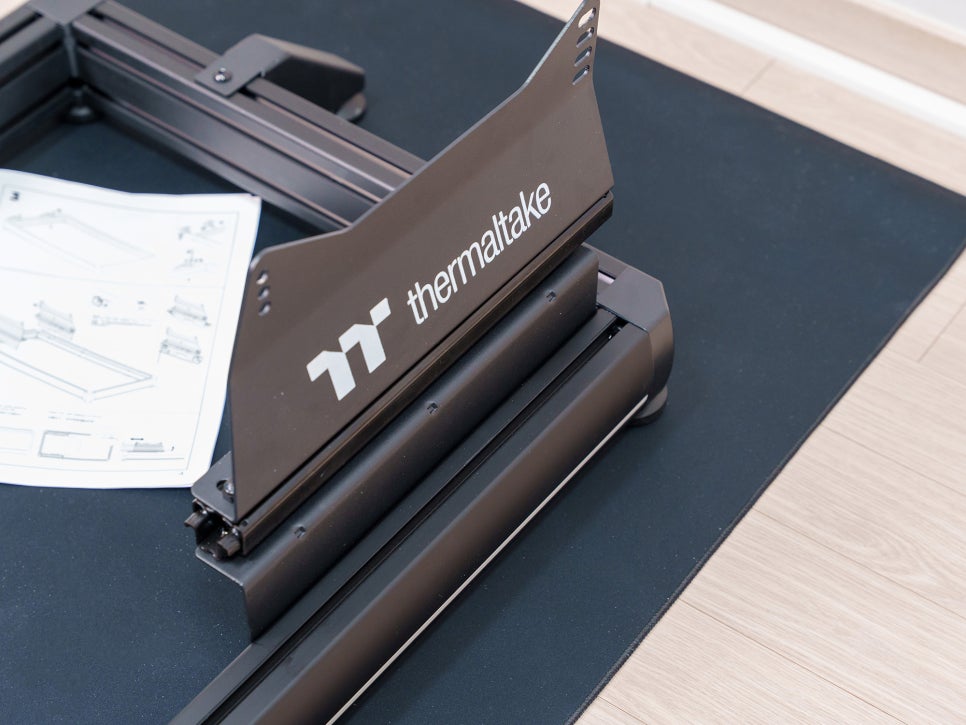
Instead of using the included paper manual, it’s much faster and more accurate to follow the official YouTube guide video. The assembly process itself isn’t difficult at all, though it took me a while because I was taking photos along the way.


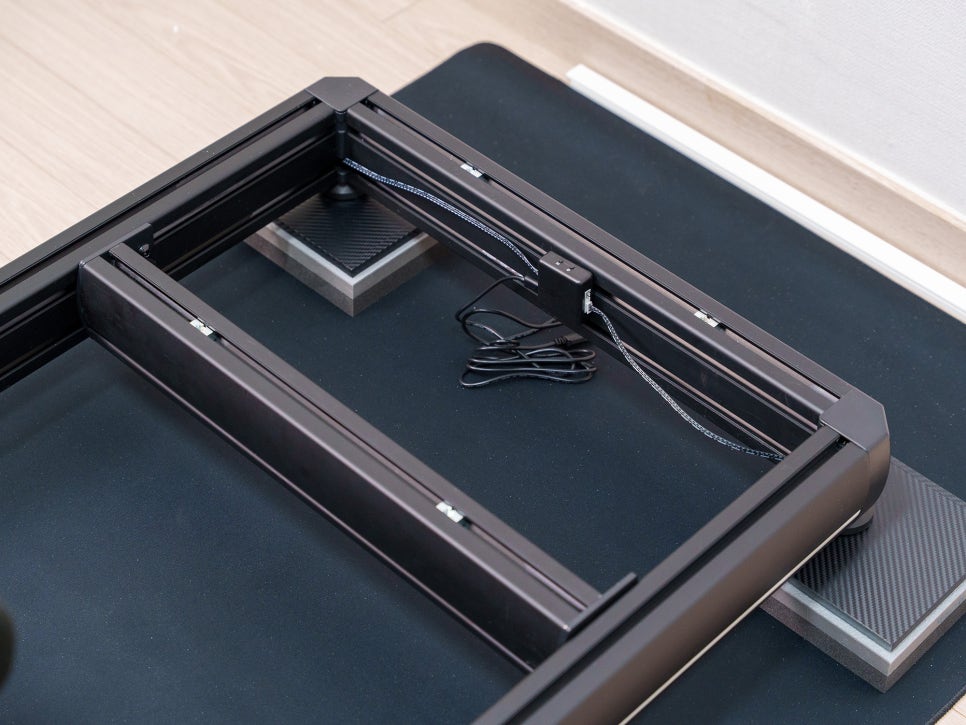
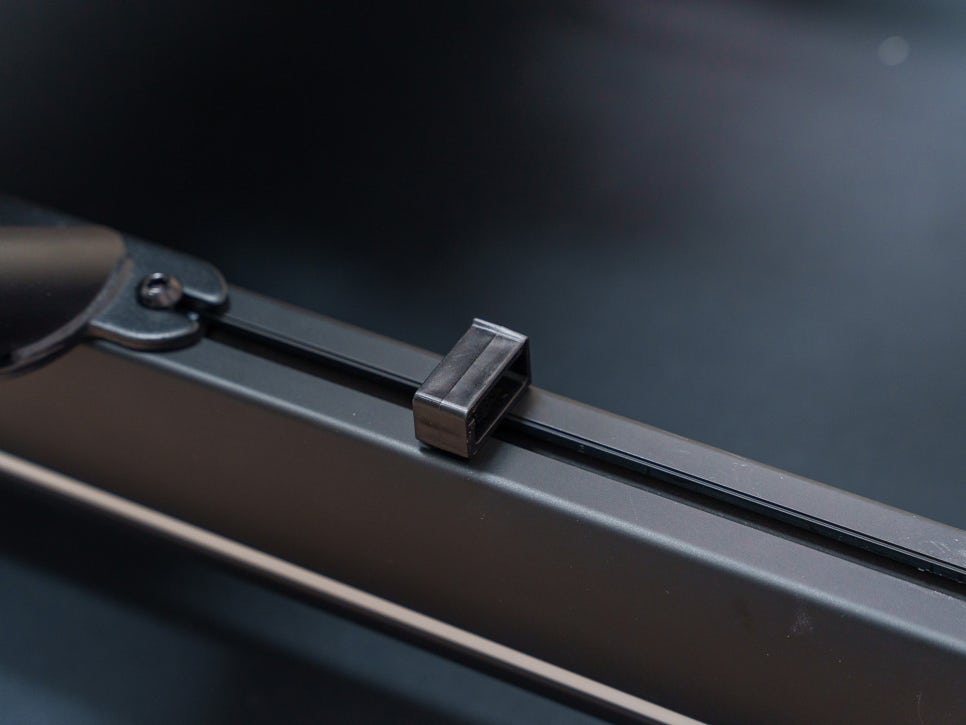
First, you start by inserting the nuts into the base profile. One important thing to note is that you should position the frame so that the part with the cable will face the wall once assembly is complete.

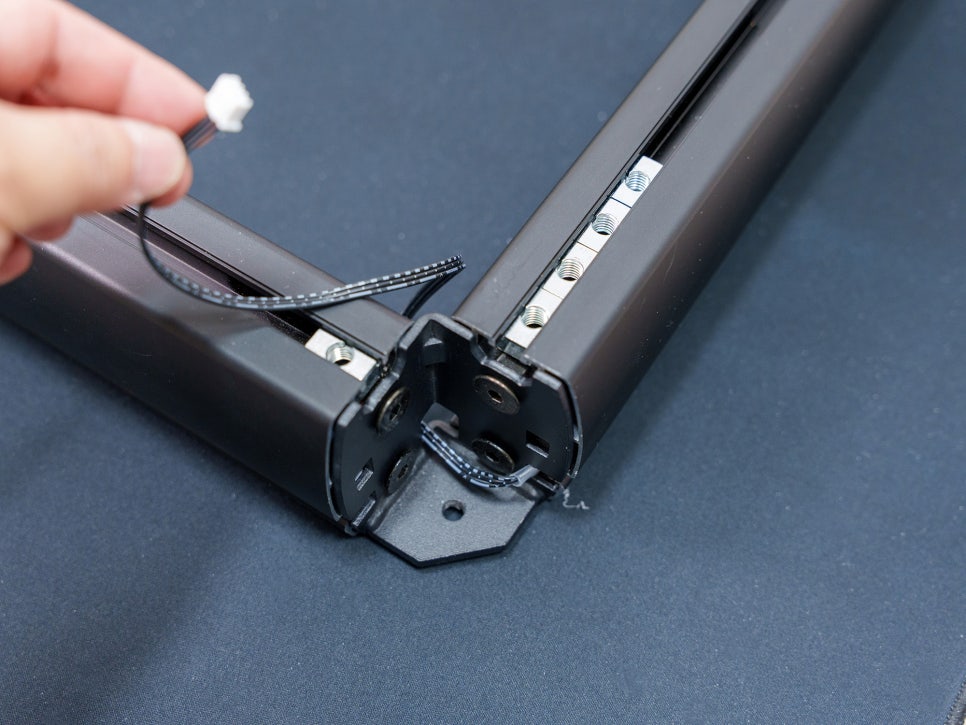
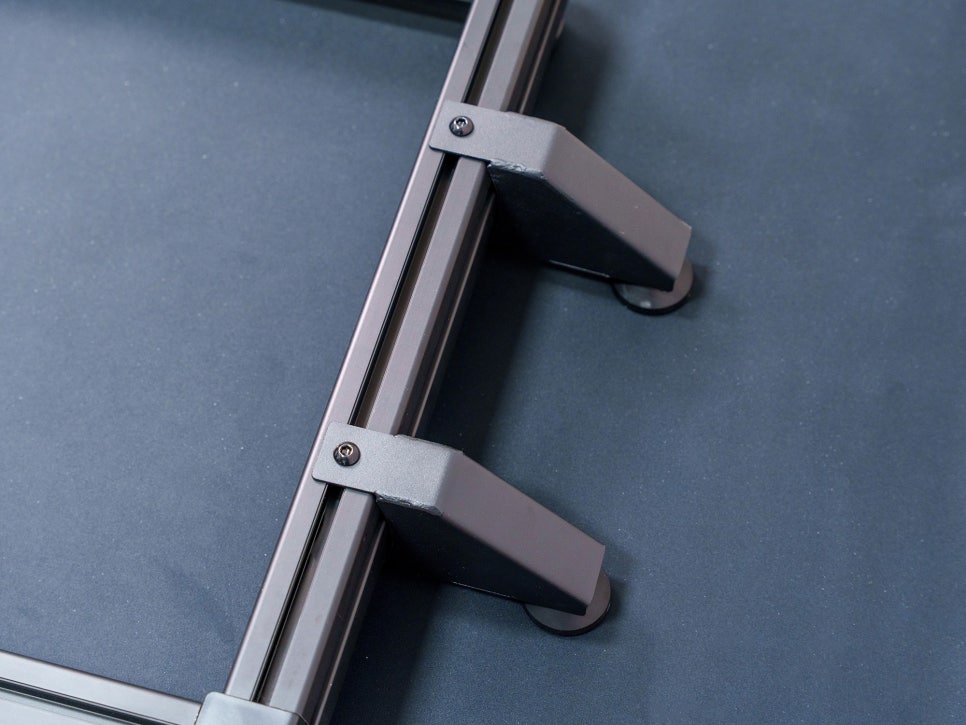
You attach L-shaped locking frames to the four corners of the base profile to secure the structure, then pull the LED cable through the inside of the frame.
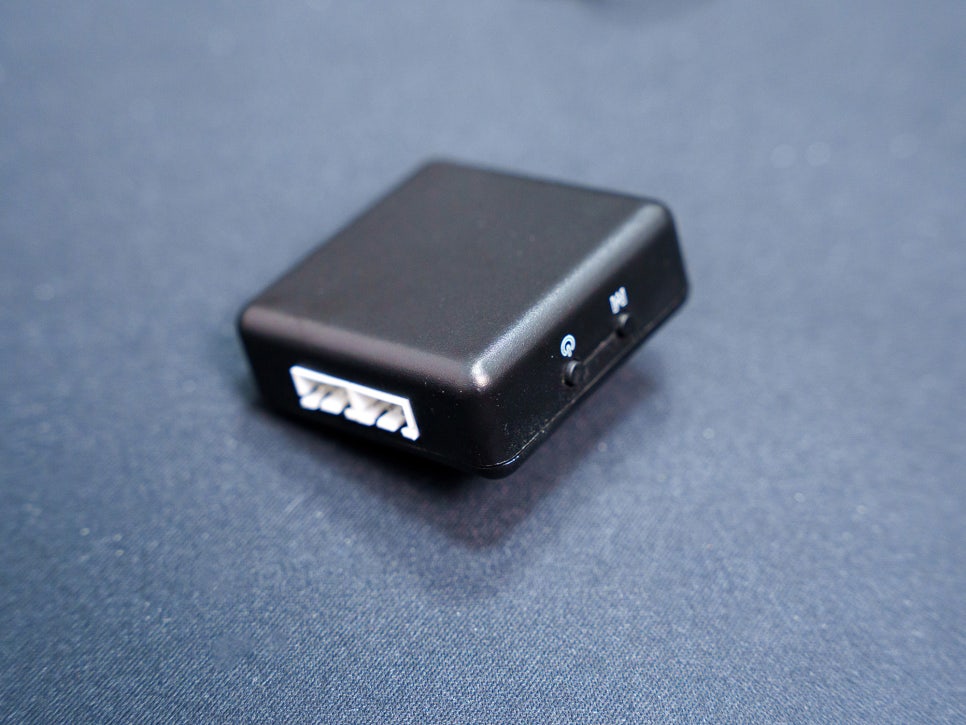
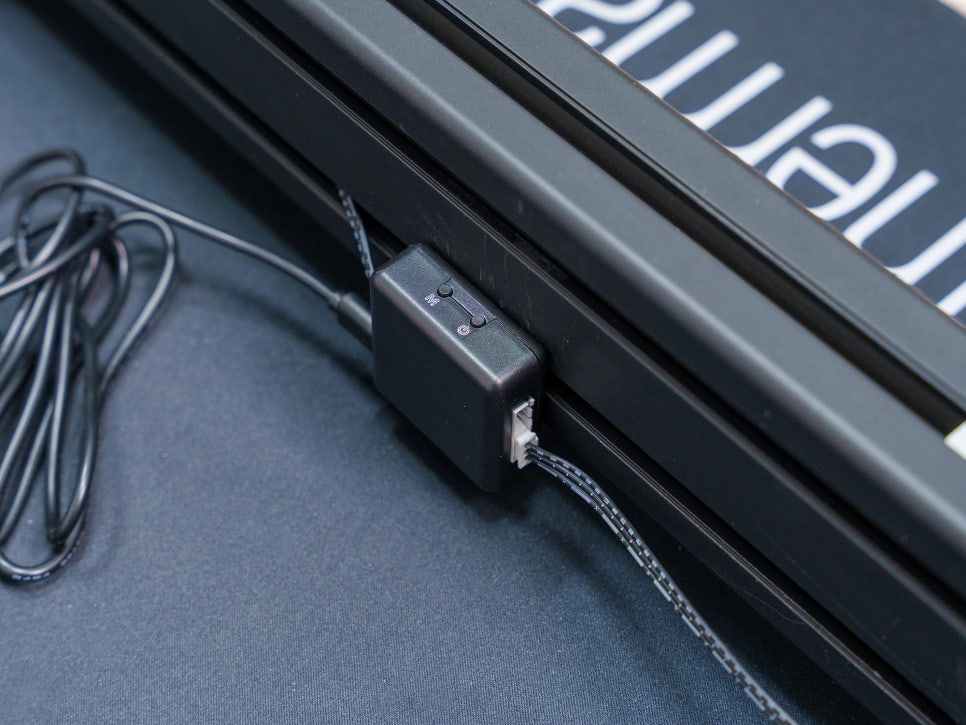
The base frame has built-in RGB light strips on both sides. By connecting them to the included RGB hub, you can enjoy 20 different lighting effects and color changes. There’s also a “rhythm pickup mode” where the LEDs react to ambient vibrations.
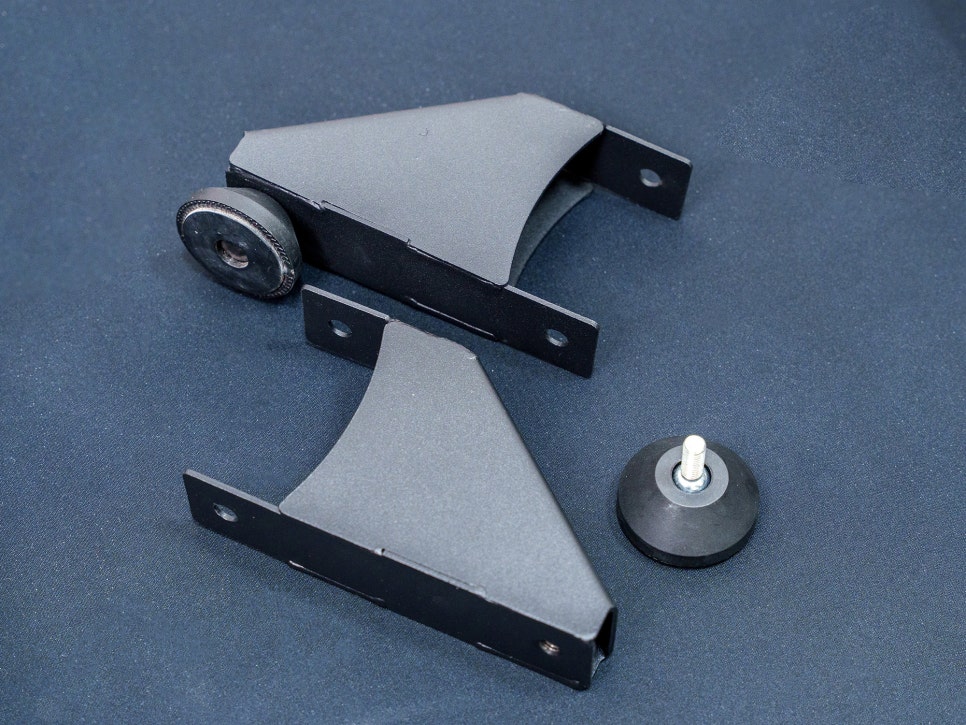
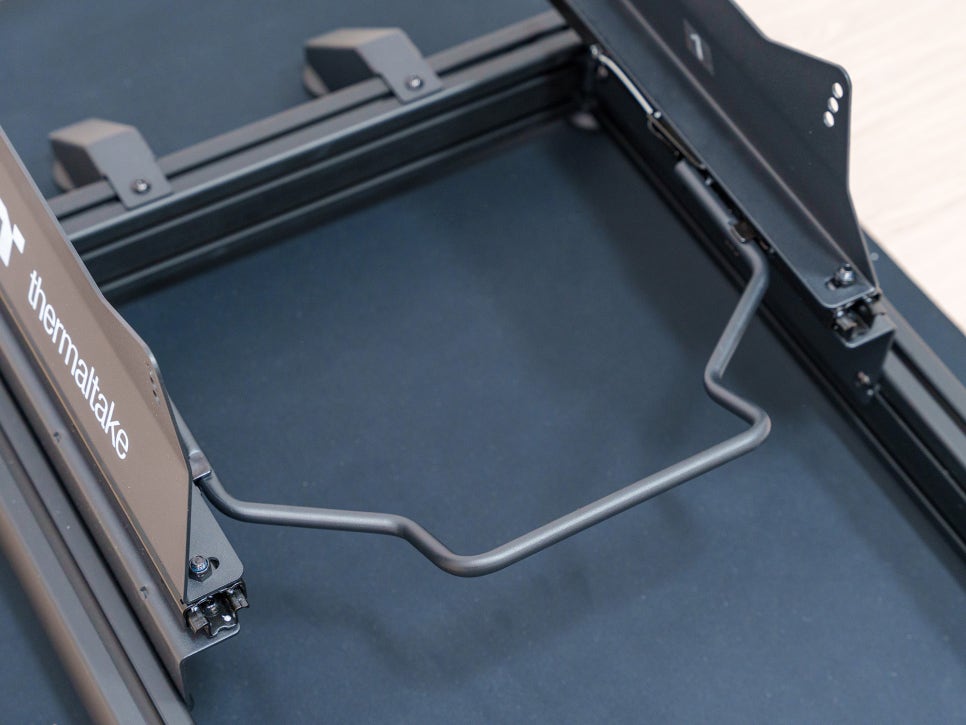
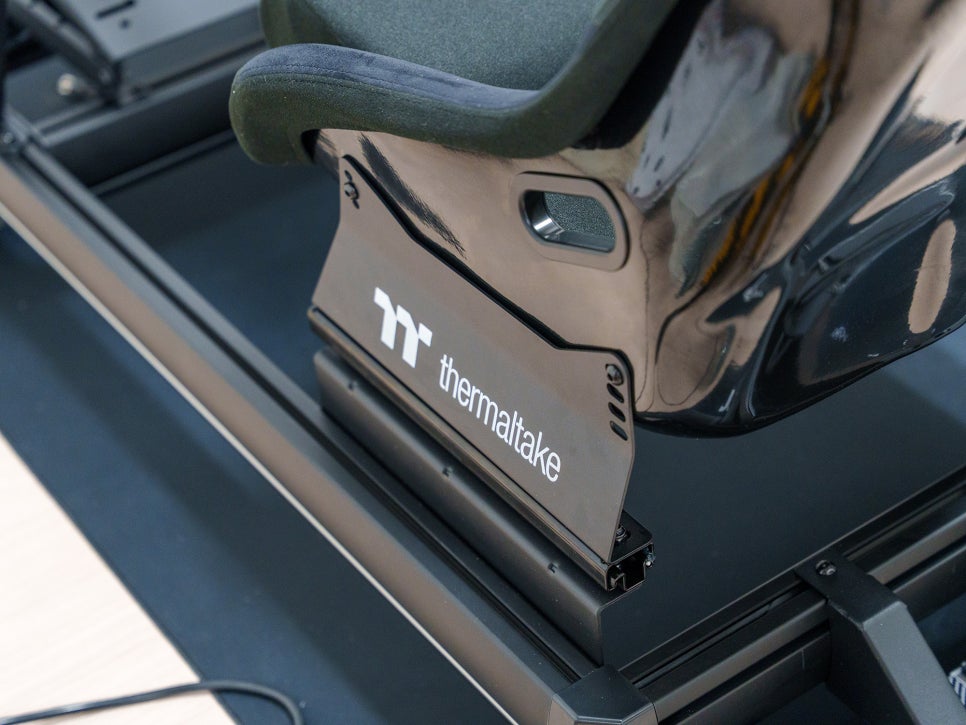
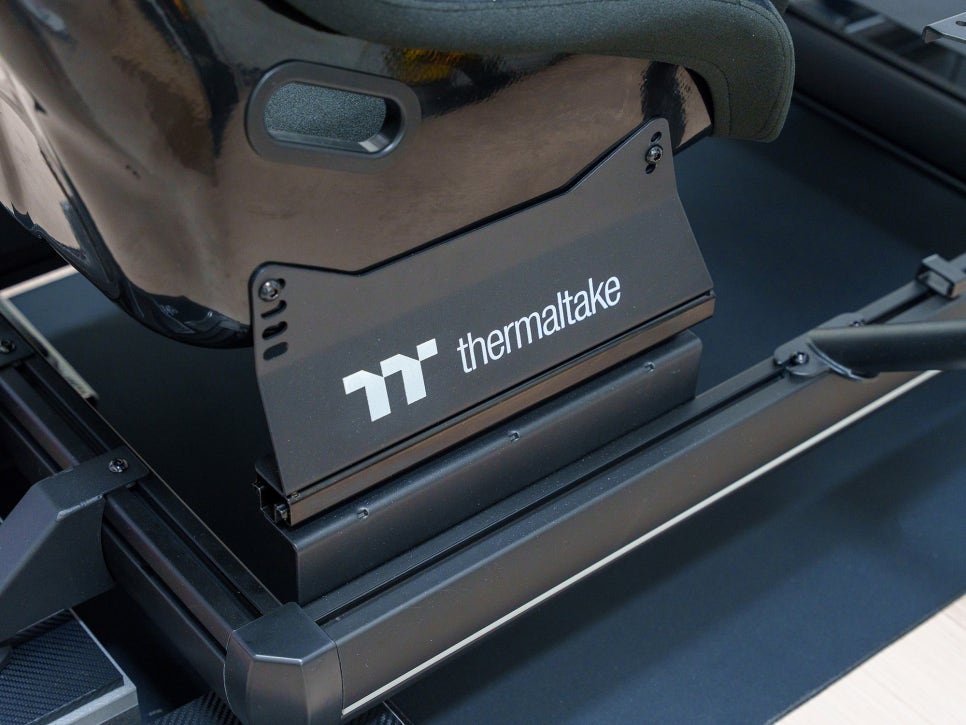
Next, you install the Anti-Tip bracket at the rear. This is a safety feature that prevents the seat from sliding backward during a race. It’s a necessary design, especially when using a high-output wheelbase that can exert a surprising amount of force on the seat.

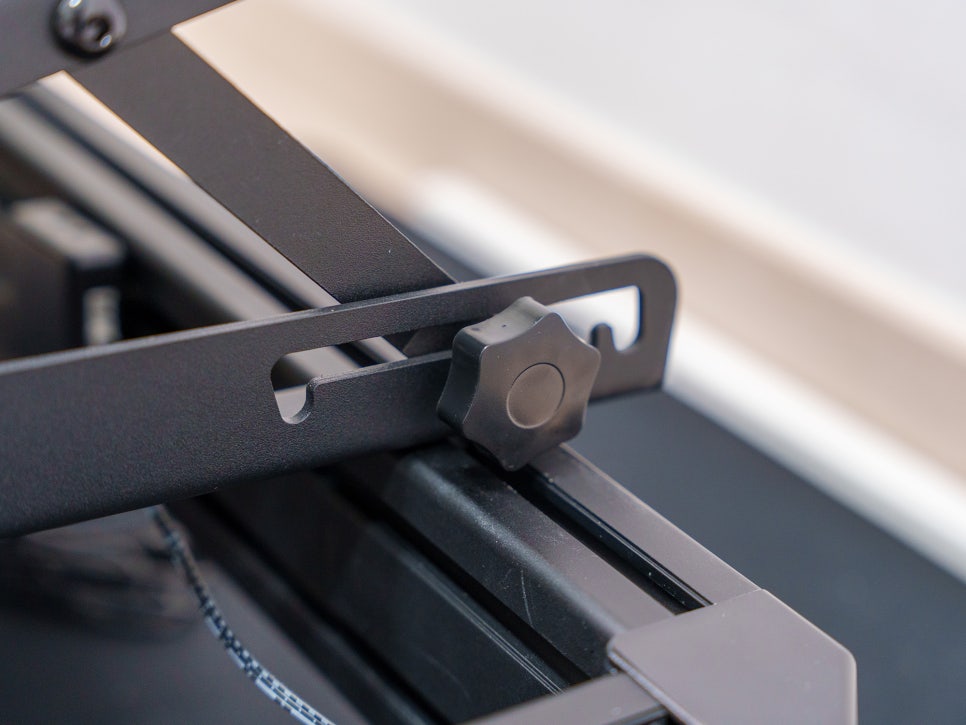
Then, install the seat base, which is where the racing seat will be mounted, and attach the position lever that allows you to adjust the seat forward and backward.

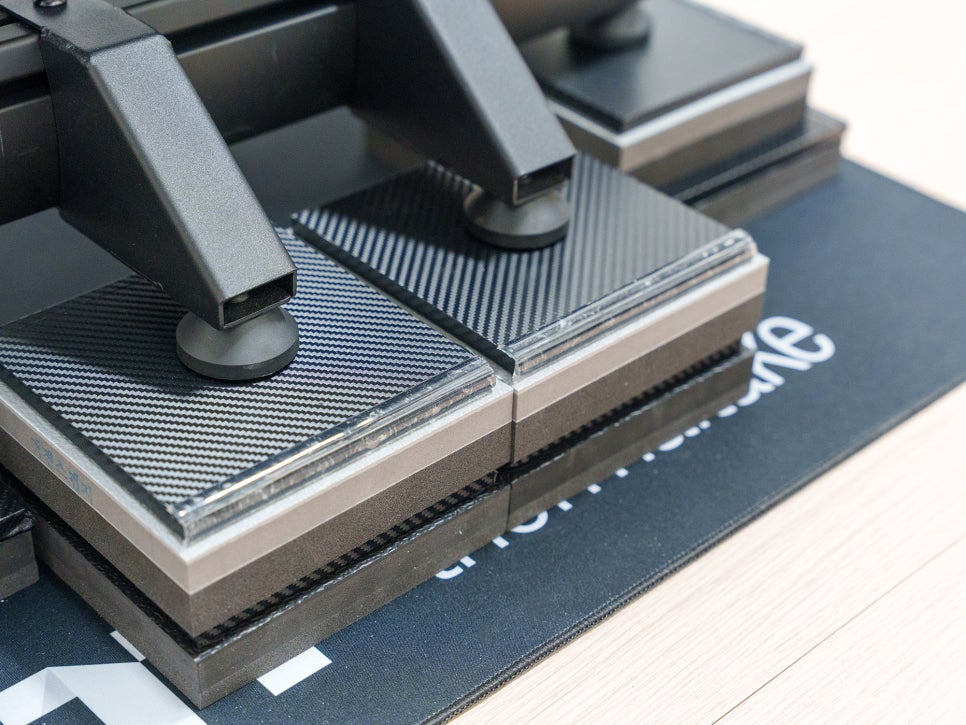
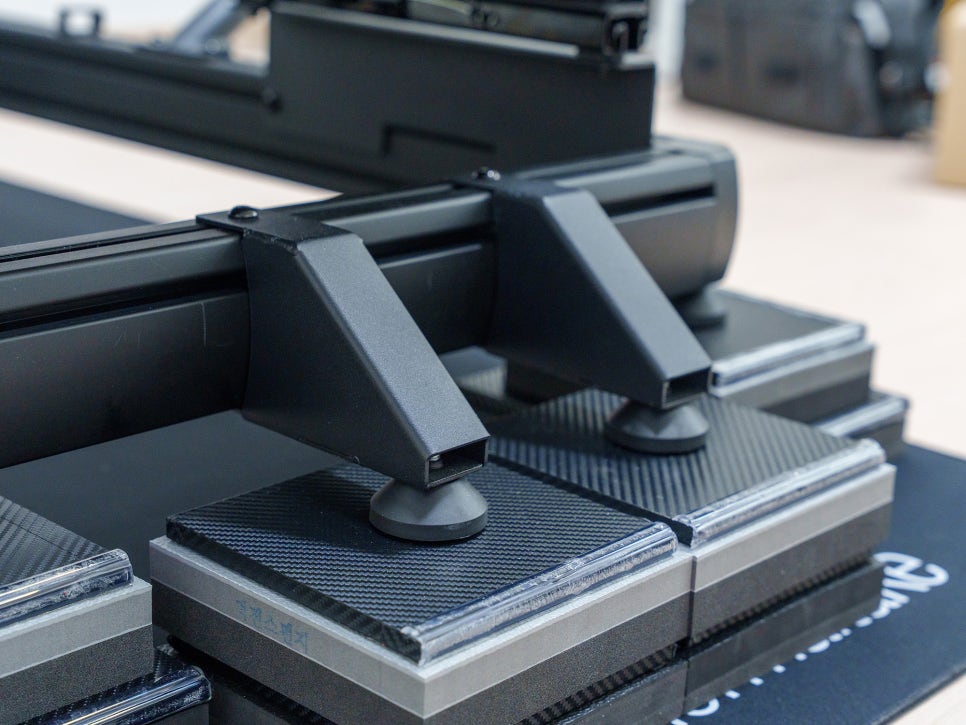
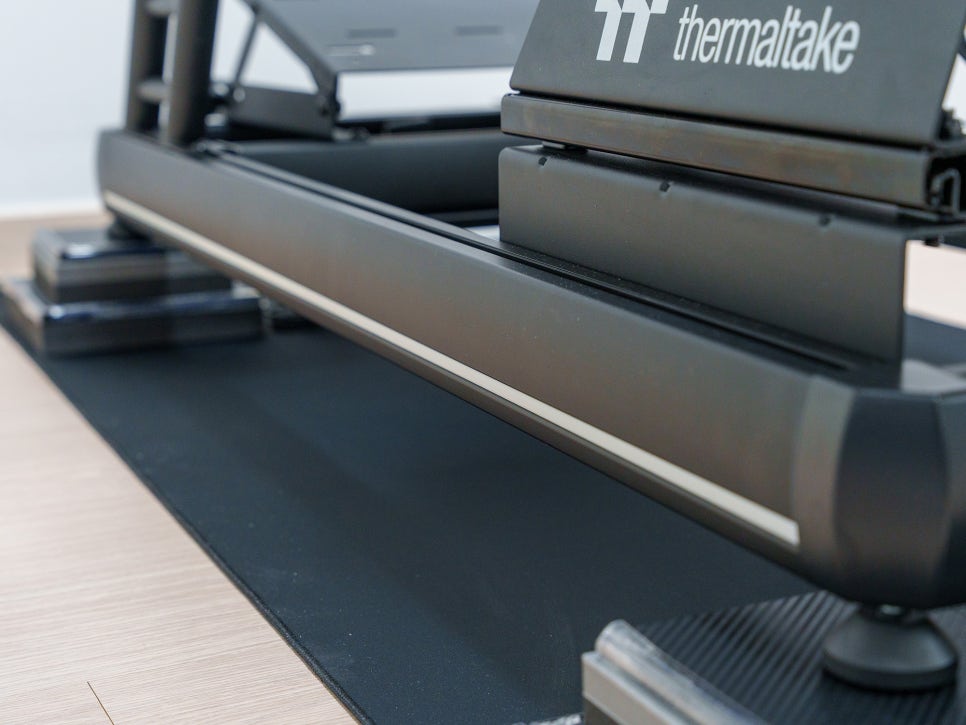
Before putting the seat on, I laid down the anti-vibration pad I made in my last post.
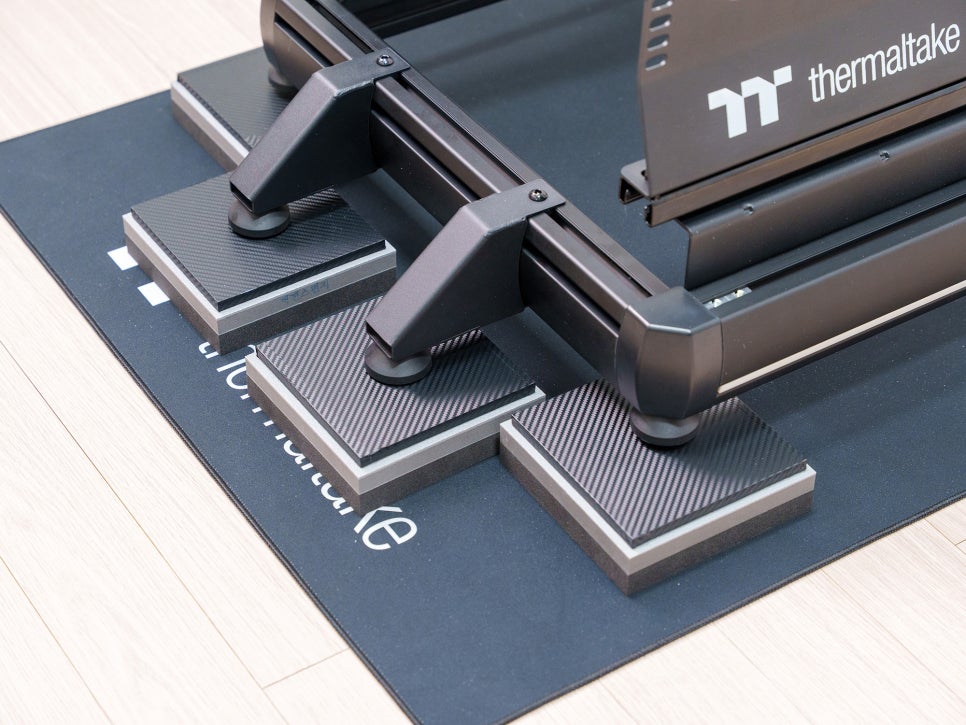
The 160×160 size fit the base perfectly. I’ll start by playing with the 35mm anti-vibration pad, and if I feel like vibrations are still transferring to the floor below, I can always buy another one to stack on top.
Now it’s time to attach the seat. The GR500’s racing seat is a bucket design made of fiberglass, offering a seating experience that feels very similar to a real race car.

The seat is designed to let you sink in deep while cradling your sides, which helps maintain a stable posture even in games with a lot of cornering.
It also has holes for a seatbelt harness on the upper sides and supports both front-to-back sliding and height adjustment.
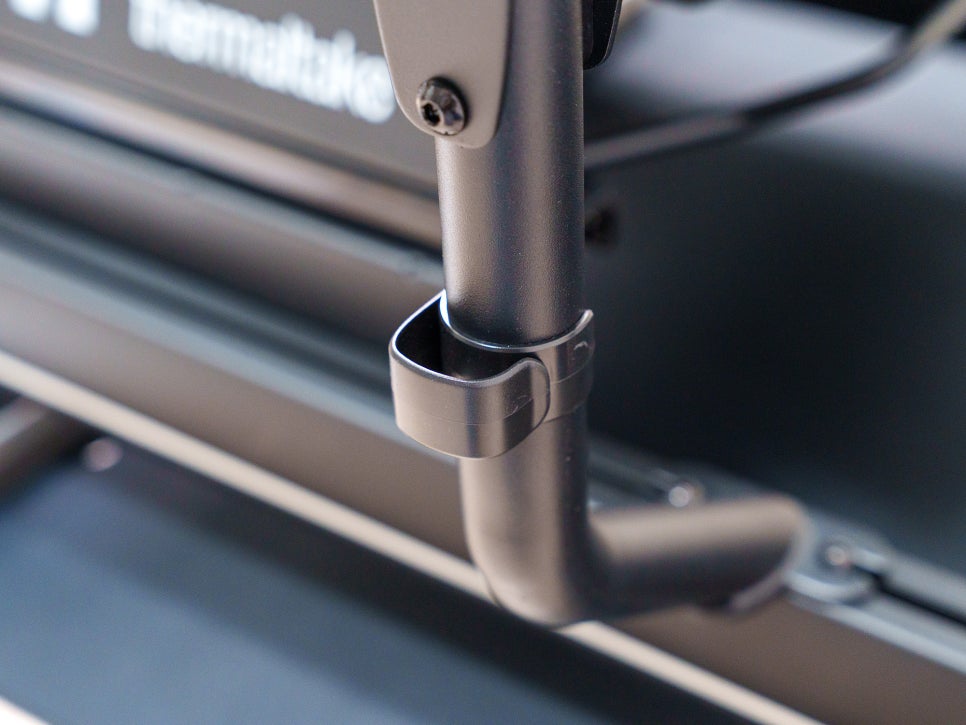
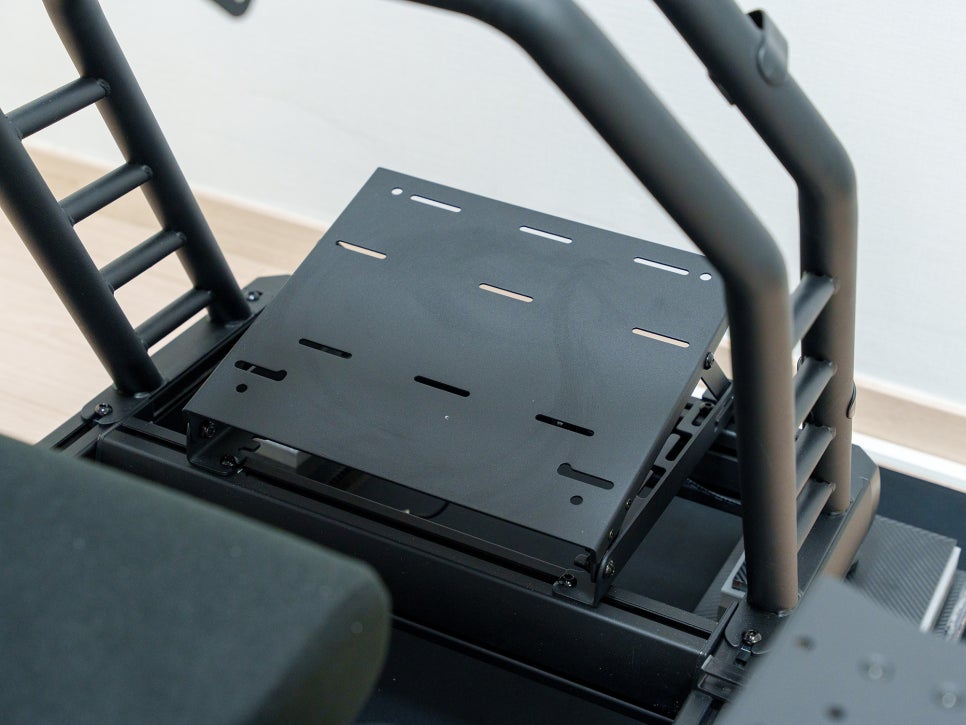
Next, you install an additional profile and attach the pedal mount.
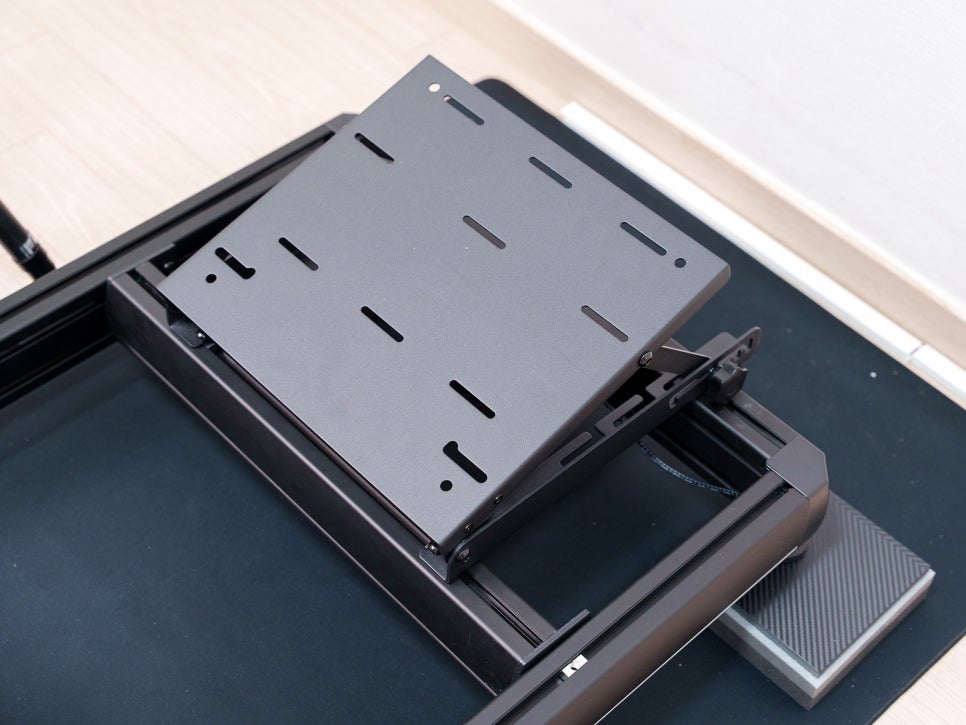
The pedal mount is also made of steel. You can directly mount pedals from major manufacturers, but for products that come with a base plate, you’ll need to check for compatibility.
I ordered the SimruiTi racing pedals, and I was able to install them with their baseplate by using some 2cm plastic washers. I’ll cover that in a future post.
The pedal mount can be adjusted to four different angles—0, 7.5, 15, and 25 degrees—allowing you to set it up according to your leg length and driving position.
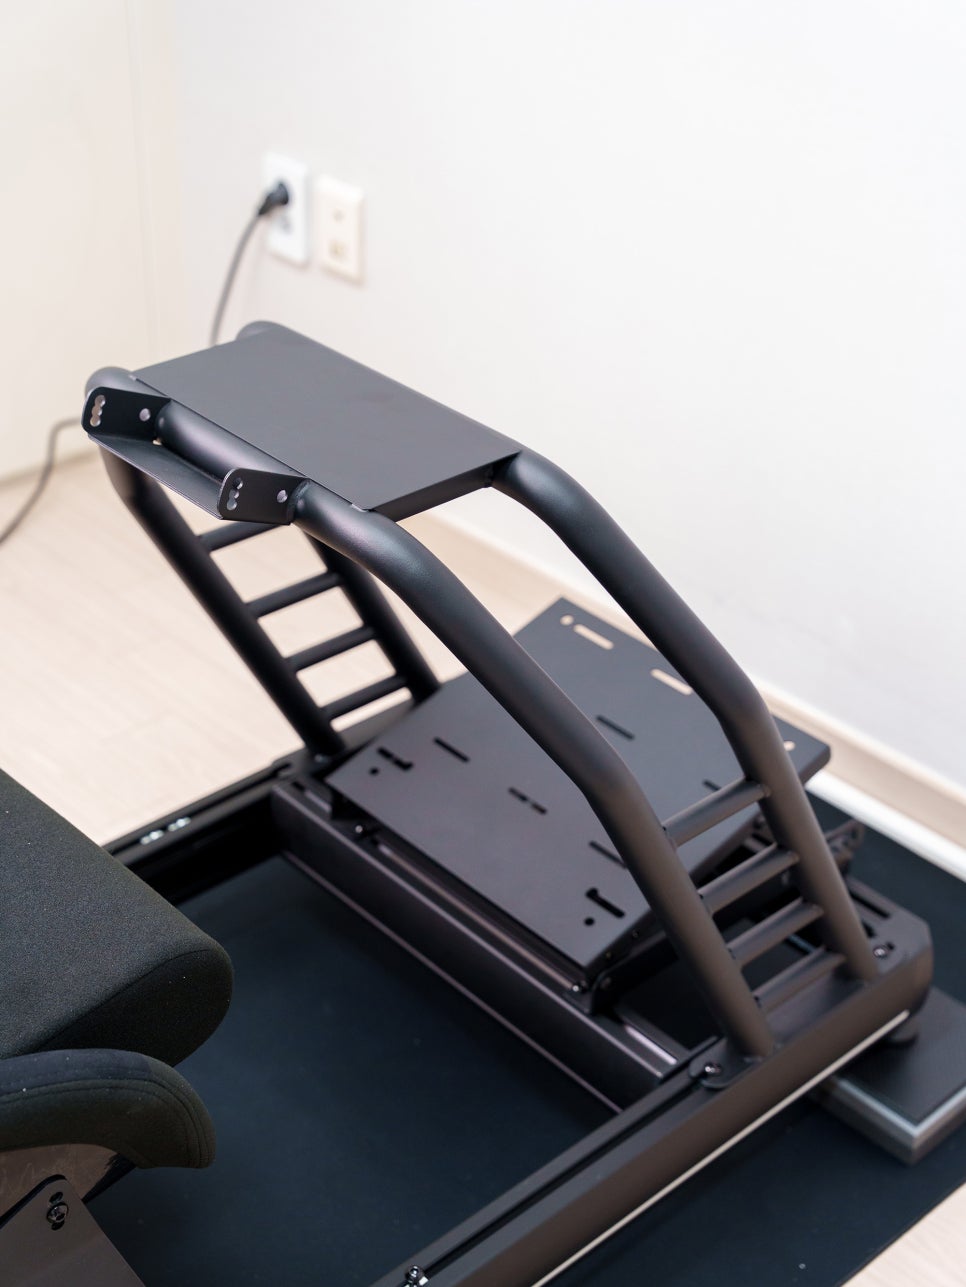
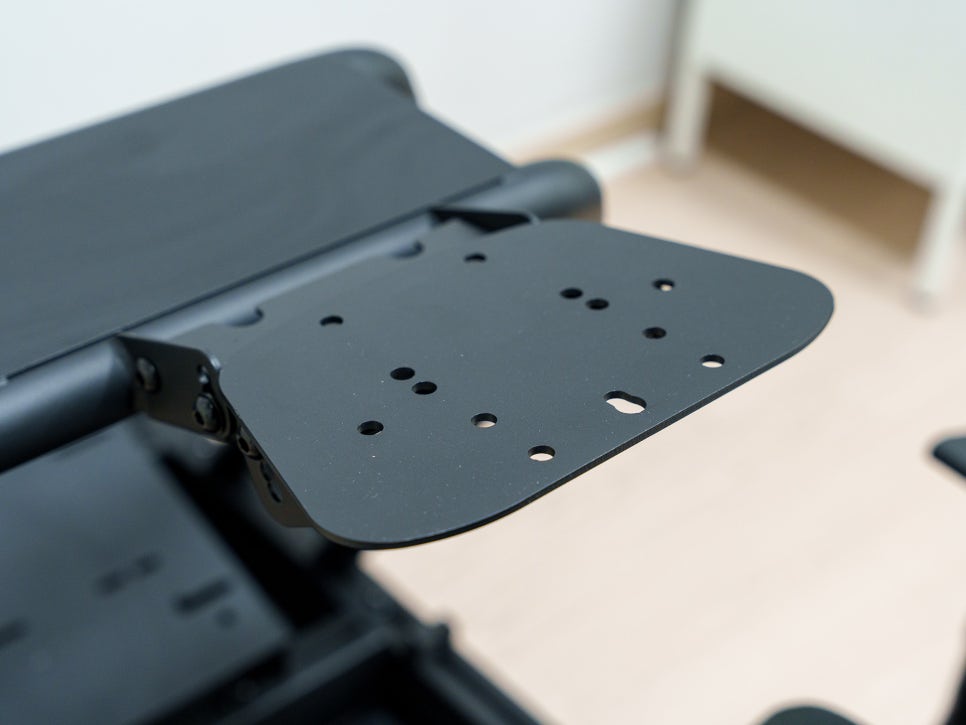
Next, I attached the steel steering wheel mount. The wheelbase is where the most force is concentrated during racing, so the rigidity of this mount is crucial. The GR500’s wheel mount feels incredibly stable, with no noticeable flex even when I try to shake it from side to side.
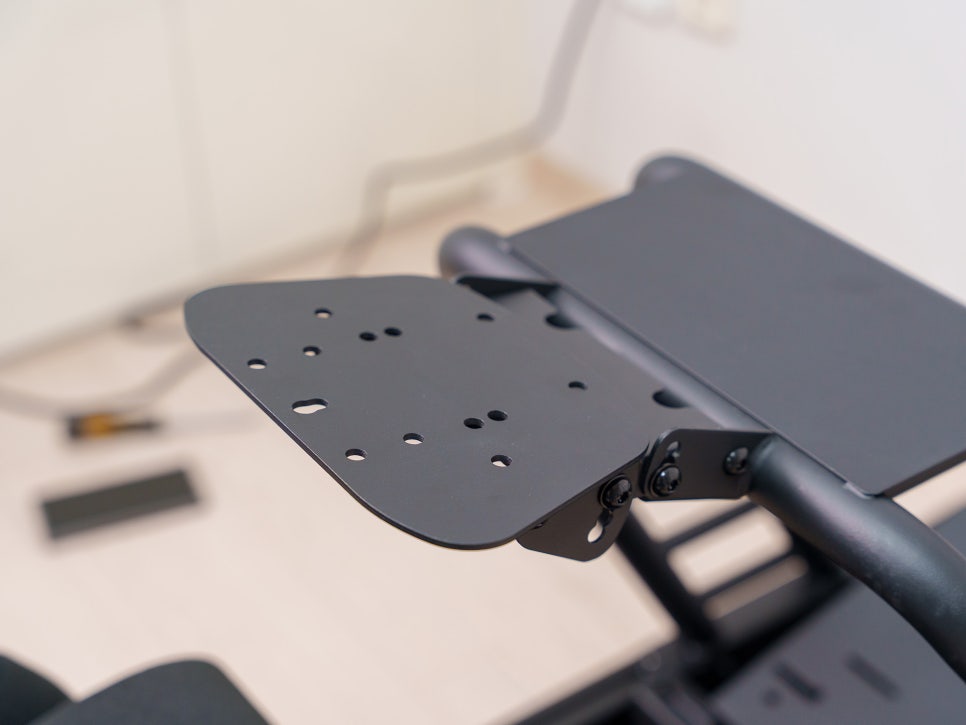
It’s compatible with most major wheelbases from brands like Moza, Logitech, Fanatec, and Thrustmaster. The top plate of the mount has various bolt hole patterns pre-drilled, so you can mount products directly without needing a separate adapter plate.
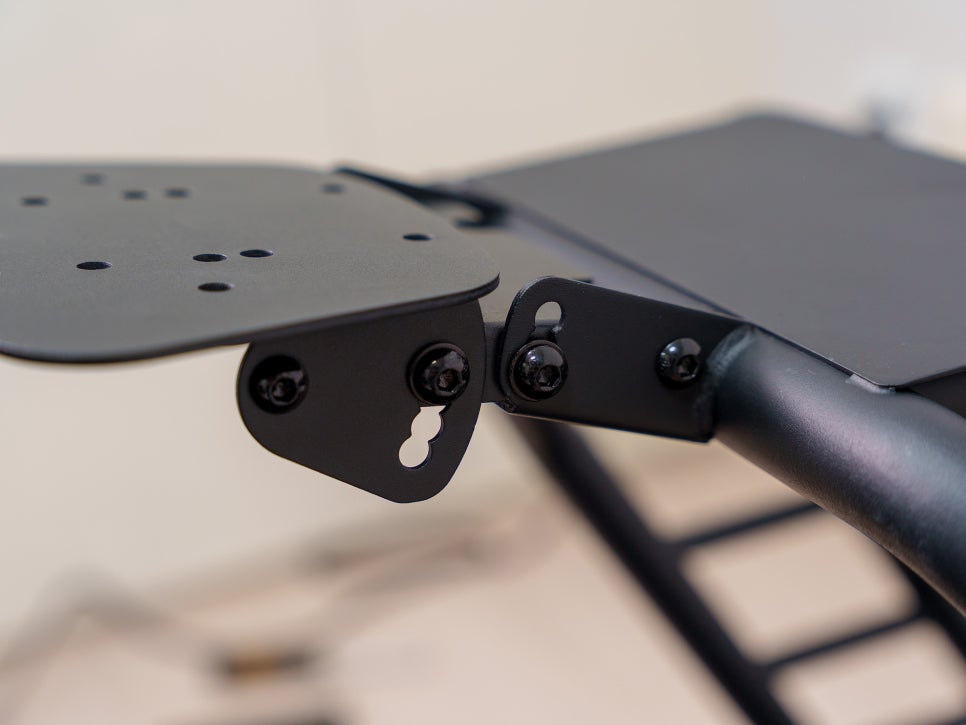
The angle can also be adjusted within a range of 30 degrees forward and 20 degrees back. This lets you change your posture to your liking, whether you prefer a Formula-style upright wheel or a slightly reclined GT-style position.
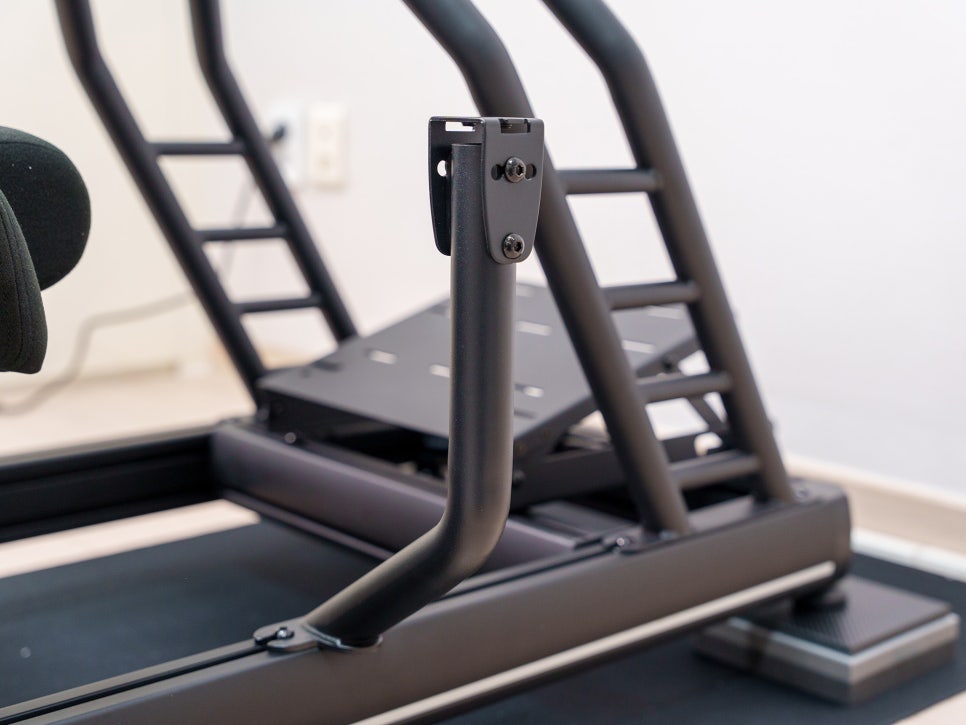
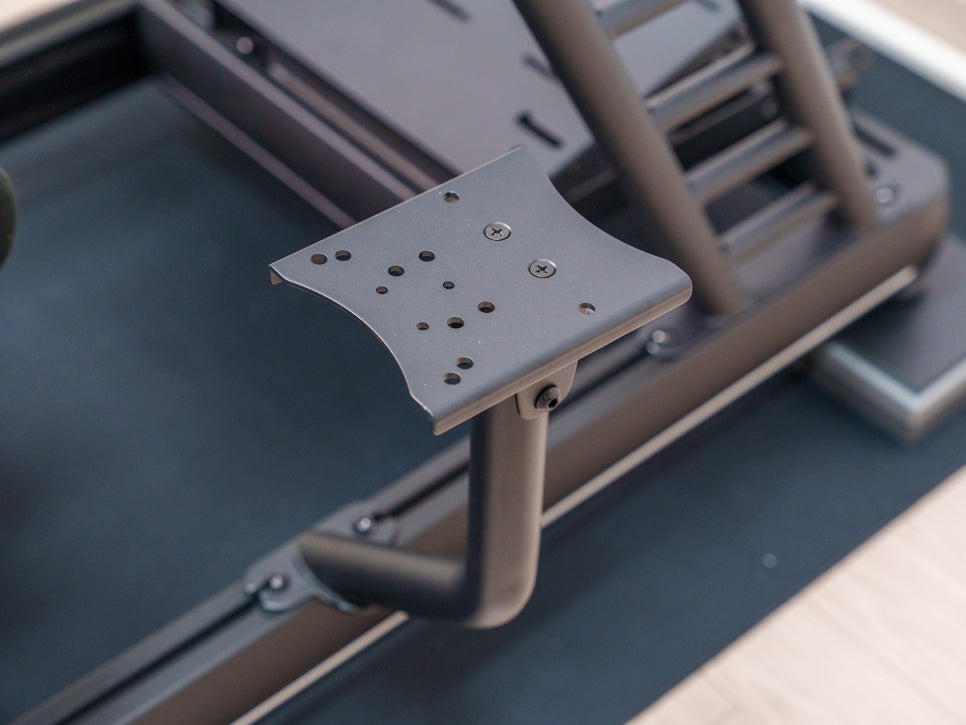
The gear shifter mount is also made of steel and supports shifters from major manufacturers, as well as angle adjustments.
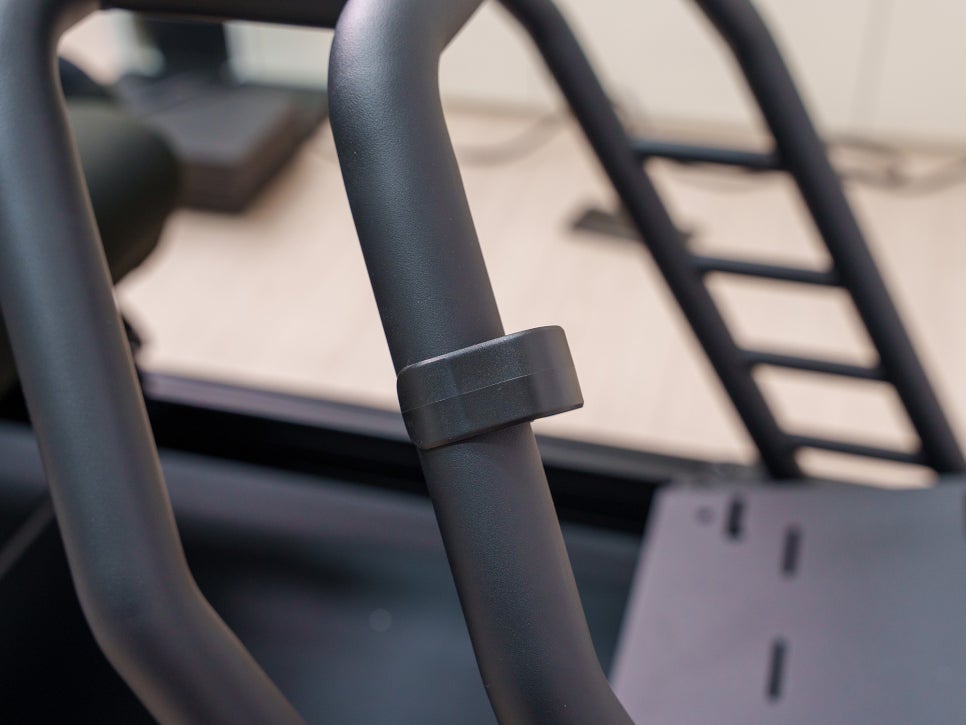
The kit also comes with cable holders for routing your wires. Used in combination with zip ties, they can help you achieve a clean cable management setup.
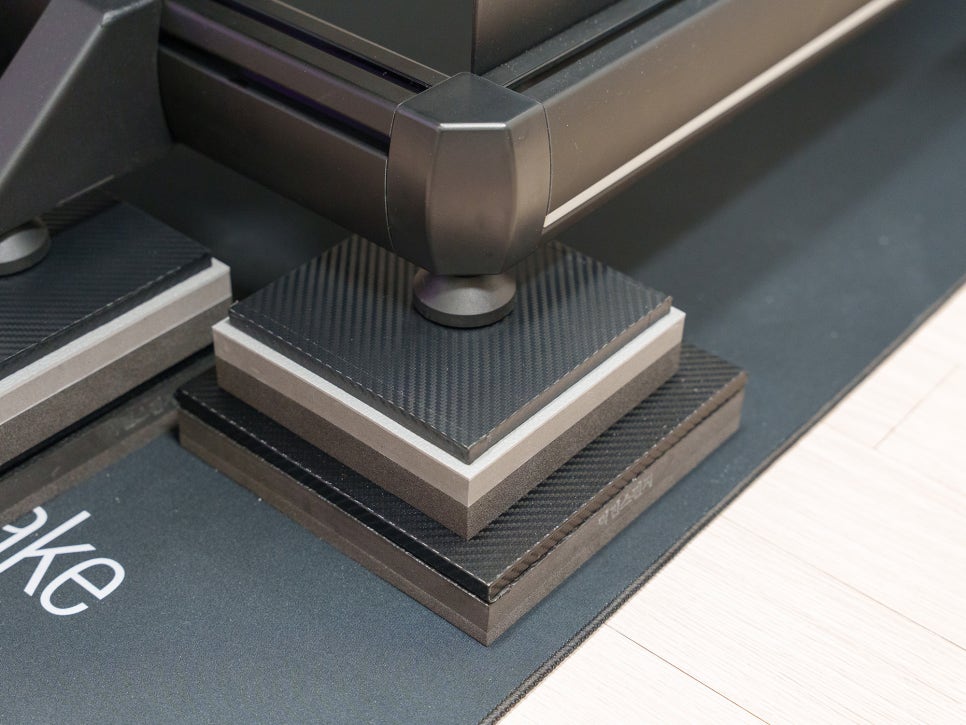
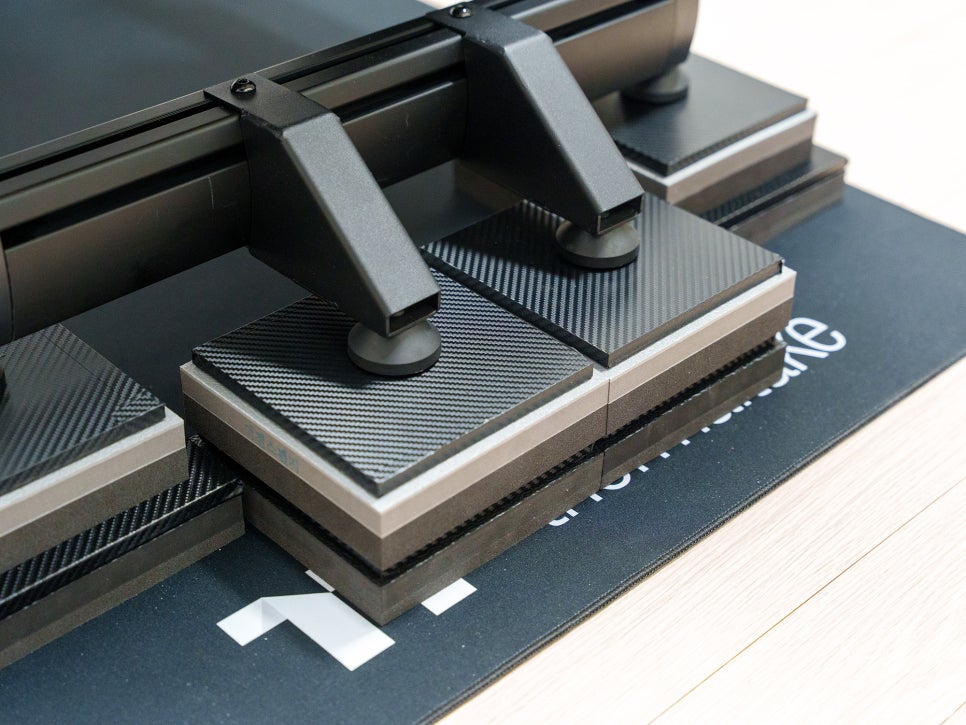
As an extra step, I also placed the 200x200x25mm anti-vibration pads I had previously made underneath. I was initially planning to use only the 35mm pads, but I was worried about potential noise complaints from downstairs. Adding this extra layer gave me much more peace of mind.
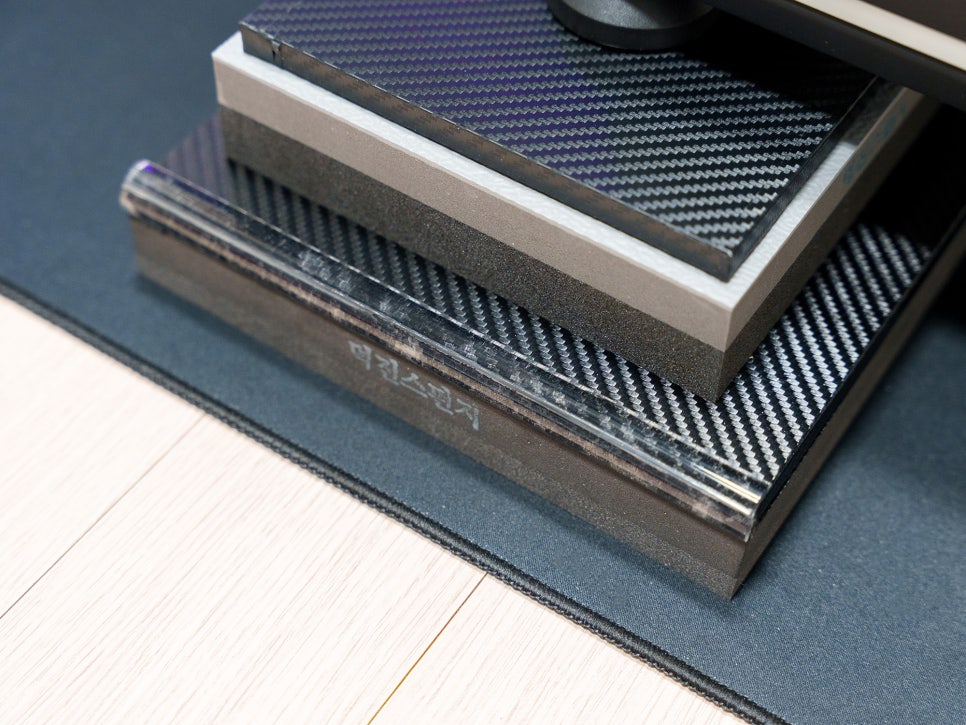
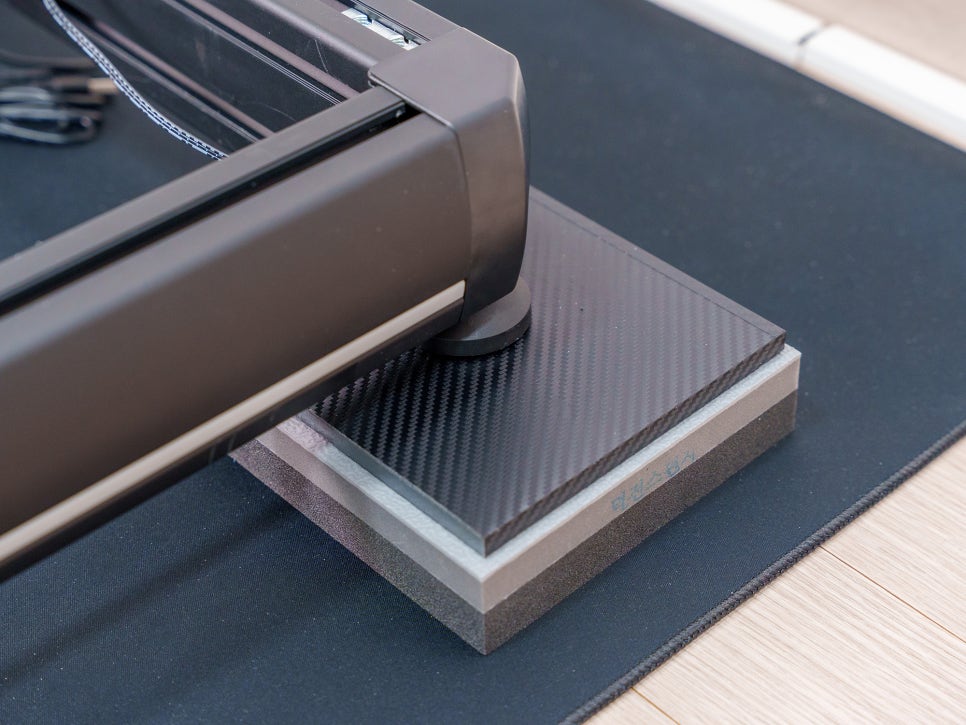
Here’s one more tip: the anti-vibration pad has a steel layer on top. This steel plate supports the entire weight of the cockpit and helps distribute vibrations, but even with a sheet cover on it, the edges feel quite sharp.

I recommend buying some corner protector tape and applying it to the areas where people might walk by frequently. You can get a set of three on Coupang or Naver Store, which should be enough to cover most of the prominent corners.
Product Features
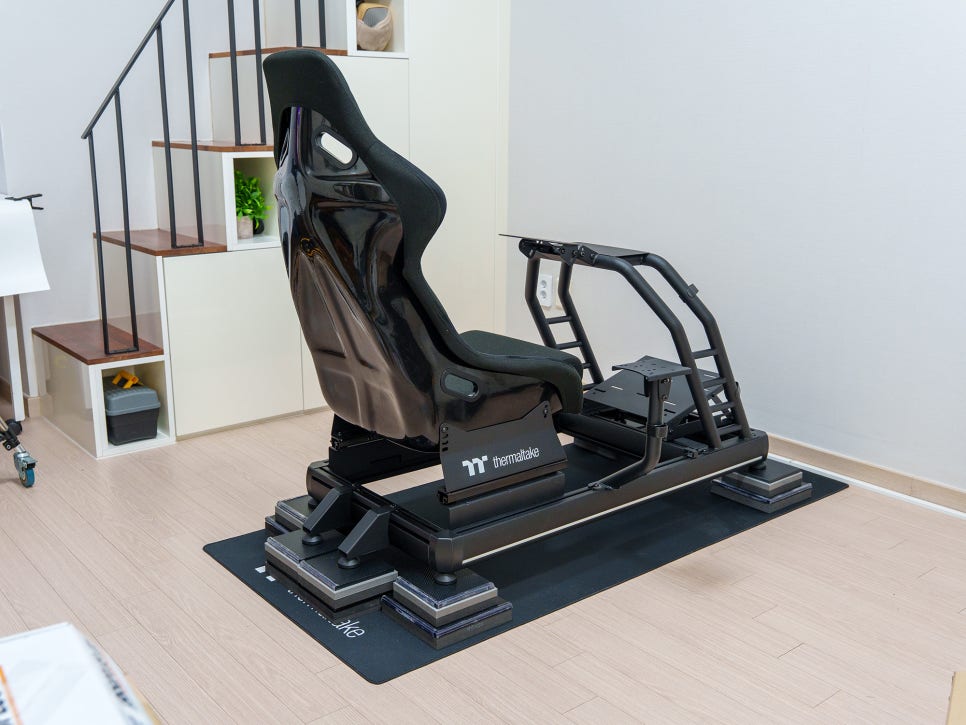
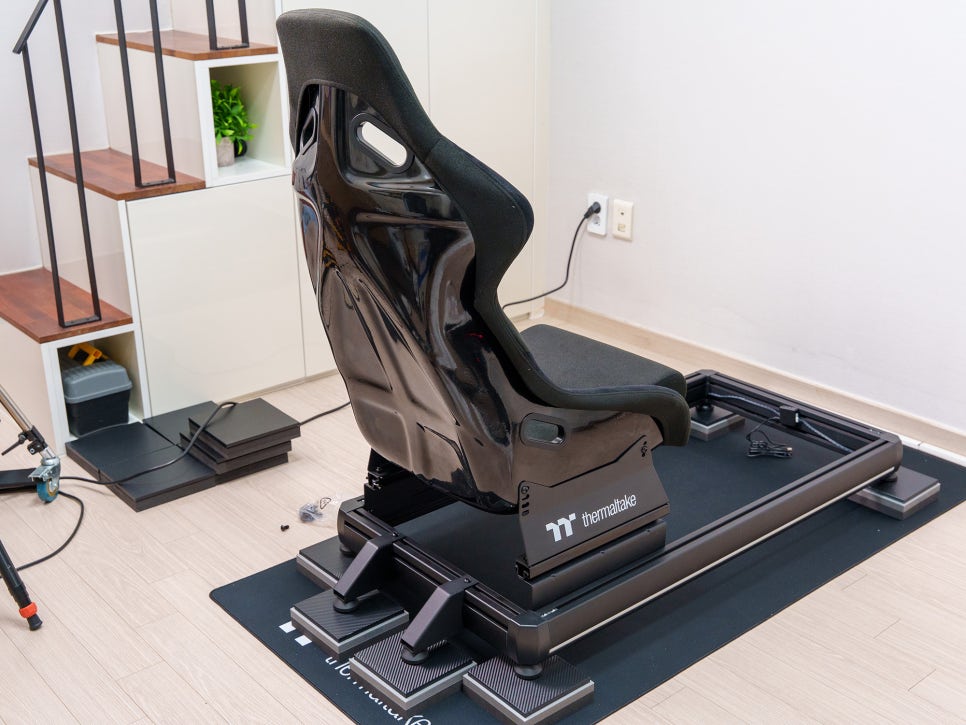
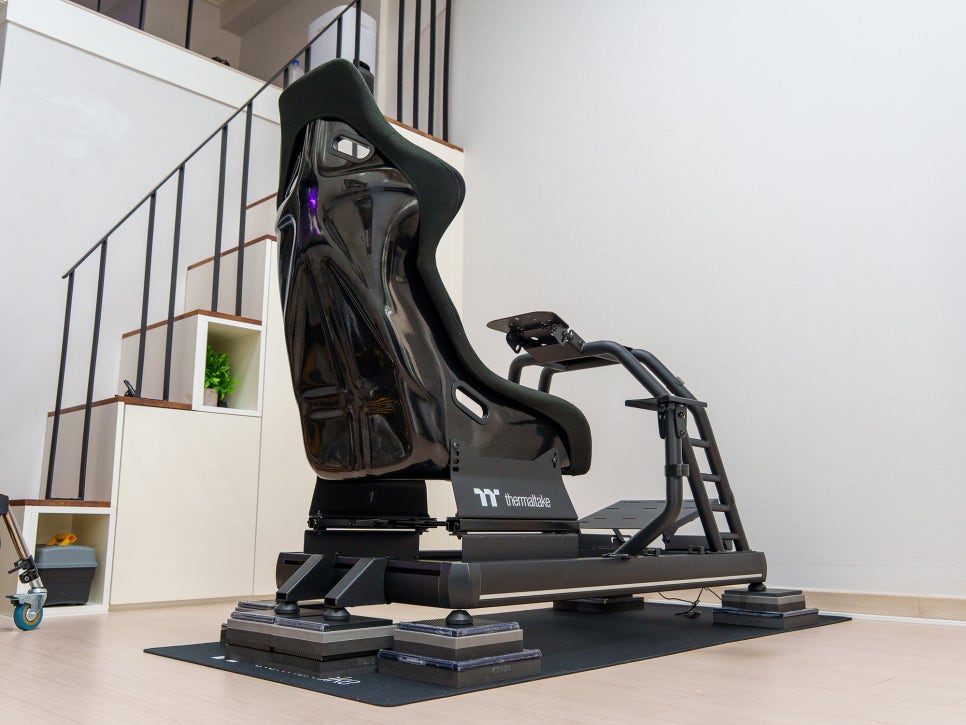
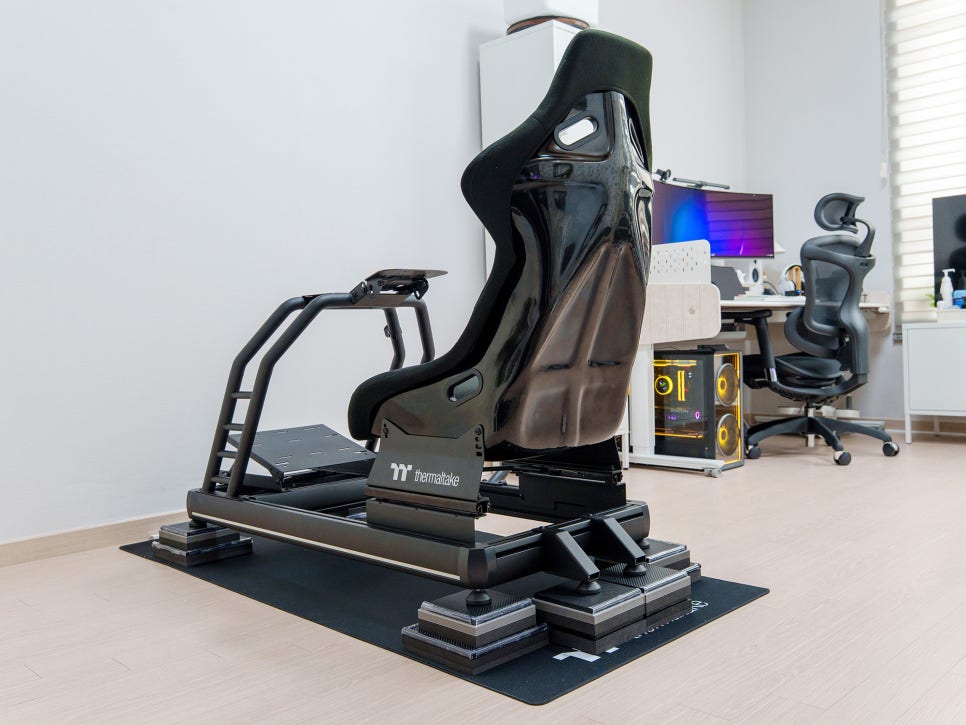
And with that, the initial assembly is complete. Looking over the product again, you can really feel that the Thermaltake GR500 isn’t just an expensive racing stand, but a cockpit that has been thoughtfully designed with the essential elements of sim racing in mind. First off, the frame structure itself is incredibly solid. The hybrid design, combining aluminum profiles and a steel frame, minimizes any shaking or twisting, even when using a high-output wheelbase for long periods.
After finishing the assembly, I sat in the seat and tried to shake the cockpit from side to side, and it felt as rigid as a single solid piece.
With the added Anti-Tip bracket, the seat doesn’t slide at all, even when I slam on the brakes or yank the wheel hard from a realistic driving position.

It also boasts wide compatibility. The rig supports most wheels, pedals, and shifters from major brands like Logitech, Fanatec, and Thrustmaster. You can also adjust the angle of the wheel and pedals, and even switch the shifter from left to right, allowing you to fine-tune your position to match your driving style and favorite game genre.


And the RGB strip isn’t just for decoration. In Rhythm Pickup Mode, the color and brightness react to the level of vibration. It’s a neat detail that gives you the feeling of being in a real race car’s cockpit, taking the immersion to the next level.
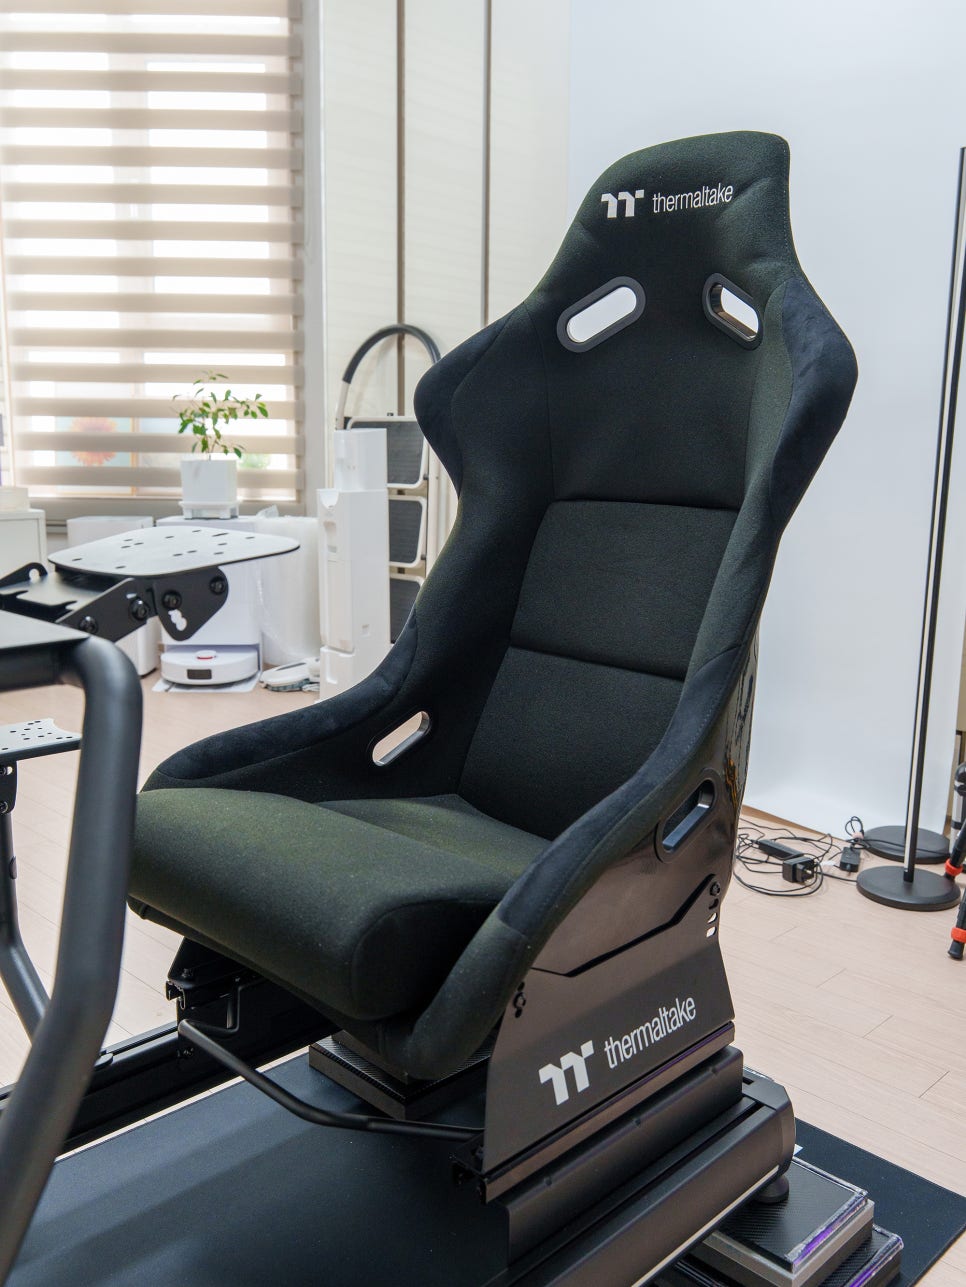
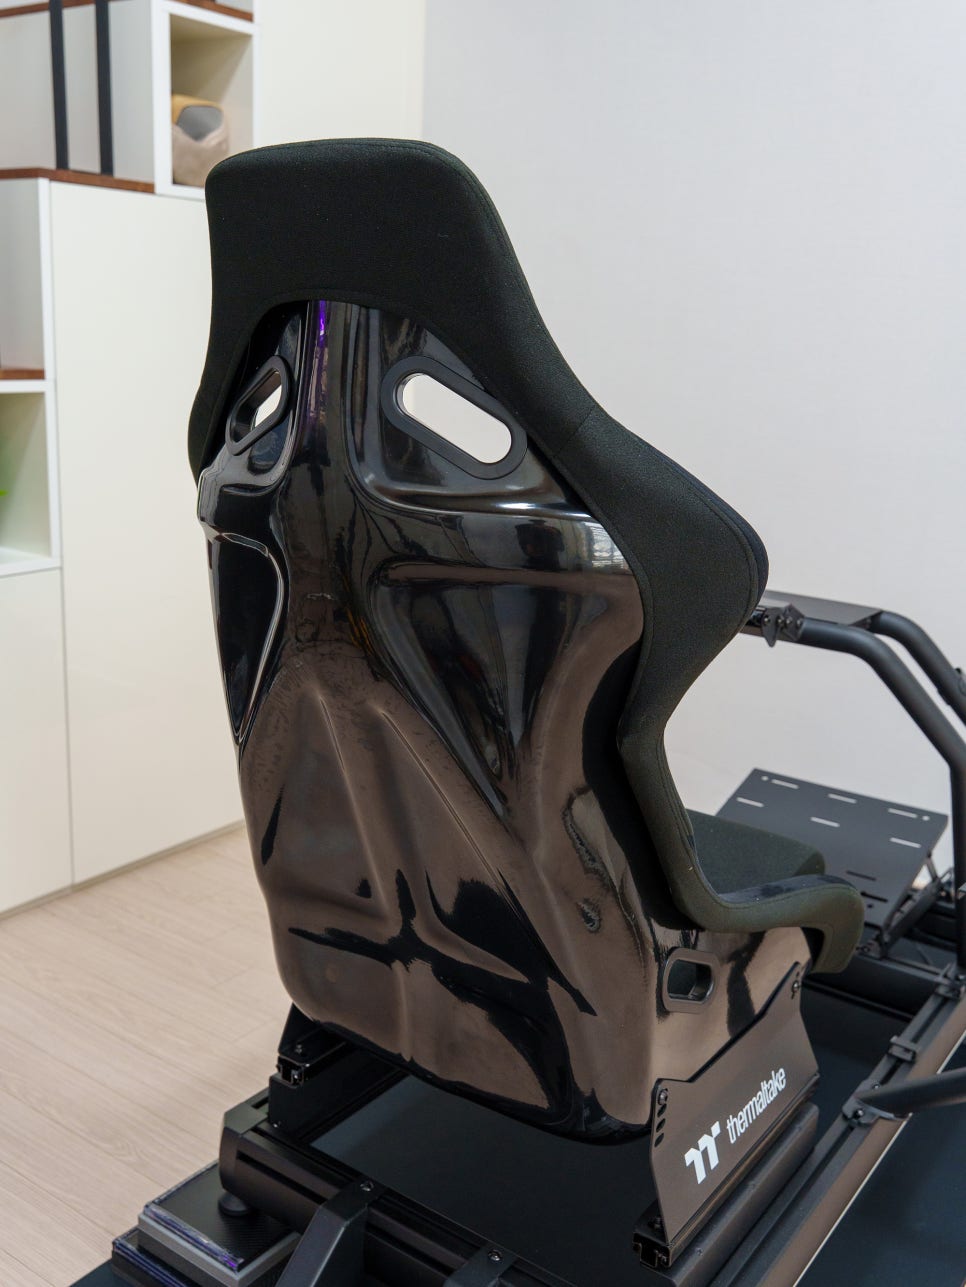
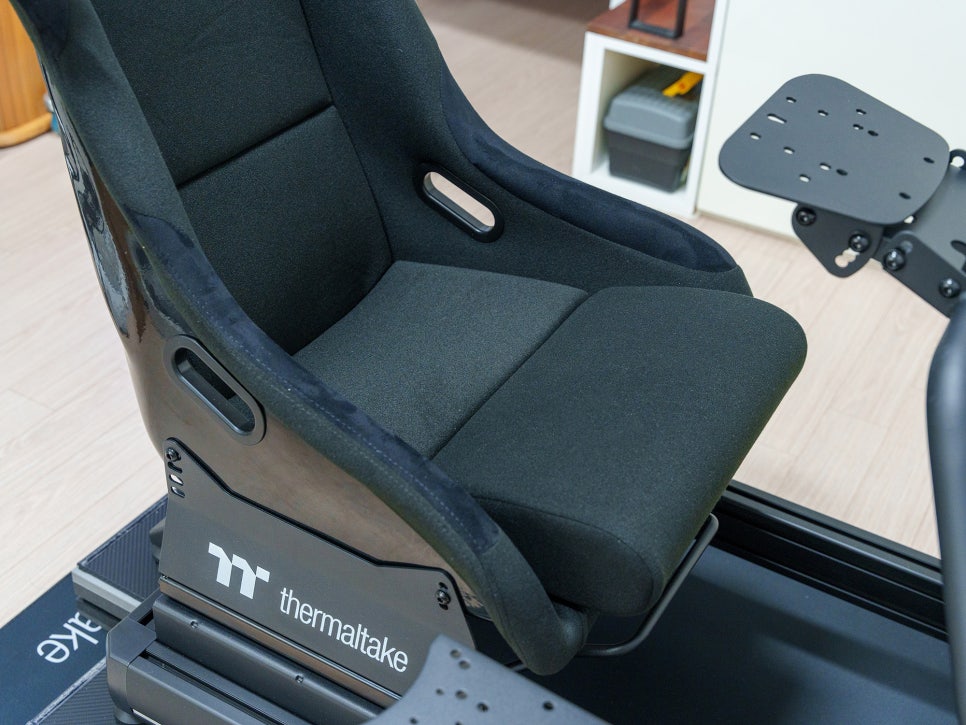
The racing seat features a fiberglass bucket design and supports both forward/backward sliding and reclining adjustments. This means if family or friends of different body types want to use it, they can easily change the setup to fit their own posture. With this range of motion, the racing seat feels very close to an actual sports car seat.
Final Thoughts
And with that, the most difficult part—assembling the racing wheel stand—is finally done. Phew. Now all that’s left is to mount the monitor, wheel base, pedals, and all the other racing gear. Since this is my first sim racing setup, I haven’t directly compared it to other cockpits, but the satisfaction I feel after putting this together has exceeded all my expectations.
From the solid frame structure and meticulous finish to the racing seat that’s reminiscent of a real car’s bucket seat, I have no complaints. I’m thoroughly impressed.
After assembling it, seeing it in my white room made me think, “Maybe I should have gotten the white one after all.” But when I turn off the lights and race with the RGB lighting on, I think the black frame actually enhances immersion by not reflecting light.
In my next post, I’ll be back with a review covering the process of mounting a monitor and the rest of my racing gear onto this GR500.